CCCApply Version 6.11.0
| Panel | ||||||
|---|---|---|---|---|---|---|
| ||||||
The CCCApply Administrator User Guide can be exported to PDF or Word by selecting the “Export” option in the More Actions menu in the upper right of this page. |
...
This Guide does not cover the specifications for configuring and managing custom (optional) supplemental questions. Those details are covered in the Working withWorking with Supplemental Questions User Guide Supplemental Questions User Guide.
This Guide does not address application “front-end” specifications such as application questions and responses, format definitions, display conditions, algorithms, or data element specifications. These specs are addressed in the CCCApply data dictionaries, crosswalks, user guides, and other end-user documents located throughout the CCCApply Public Documentationsite.
...
| Note |
|---|
Getting to the new CCCApply Administrator requires staff users to sign in to the CCC Administrator using their college-specific URL. Click here to find Administrator URLs or contact College Support Services at staffsupportccctc@openccc.zendesk.com |
...
System Administrator
(Applications->System Administrator)
The System Administrator module provides:
SSO-based authentication to all CCC colleges through custom college-specific URLs configured to their college or district IdP
User management for all authorized CCC college staff and faculty users
Access management to all integrated CCCTC administrator applications and services through a single point-of-entry
User Manager
(Applications->System Administrator->User Manager)
The User Manager module allows authorized users to view, add, edit, and delete* users within the scope of their own authorized user permissions. The User Manager section provides the ability for users with authorized role(s) to create new users and permissions for your college or district.
...
Launching the CCCApply Administrator
(Applications->CCCApply Administrator)
If your credentials include permission to configure the CCCApply Standard application, CCCApply International application, and/or CC Promise Grant (BOG Application) for your college or district, you can access those via the CCCApply Administrator.
...
Use the following steps to access the CCCApply Administrator.
Log into the CCC Administrator:
PILOT: http://<college OR district domain>.pilot.openccc.net/admin
PROD: http://<college OR district domain>.openccc.net/admin
| Warning |
|---|
User must be logged in to your college/district IdP to be authenticated by the CCC Administrator system. |
...
Use the following steps to edit your College & District Information data settings which is used in various ways for the CCCApply, International, and CC Promise Grant applications.
Log into the CCC Administrator -> CCCApply Administrator.
If you are a multi-college district, select the college for which you want to configure college information from the Select a college drop-down list. If your college is not in a multi-college district your college displays by default.
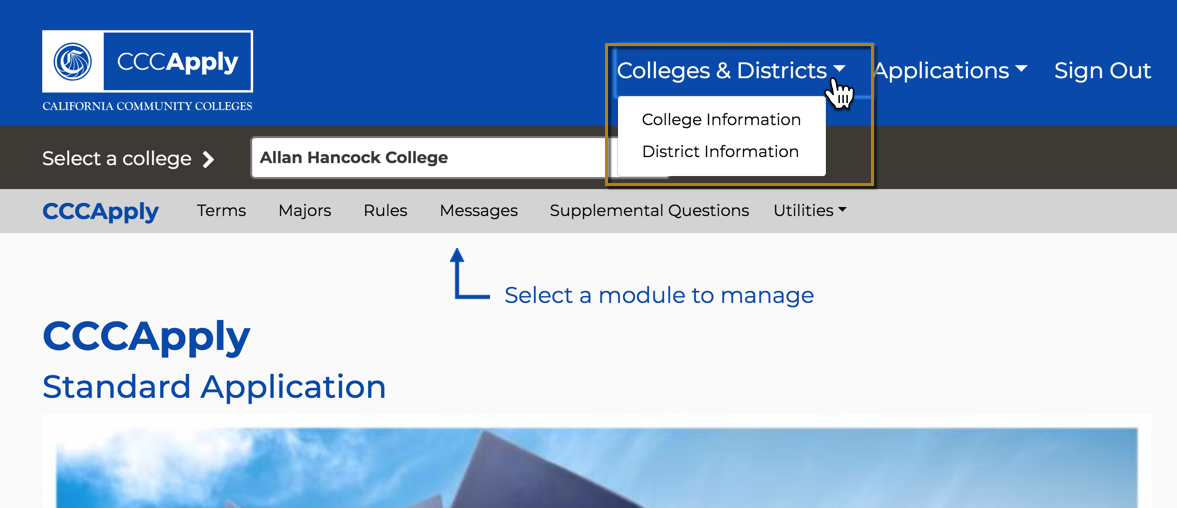
Click the Colleges & Districts drop-down list and select either College Information or District Information to display the College Information or District Information screens.
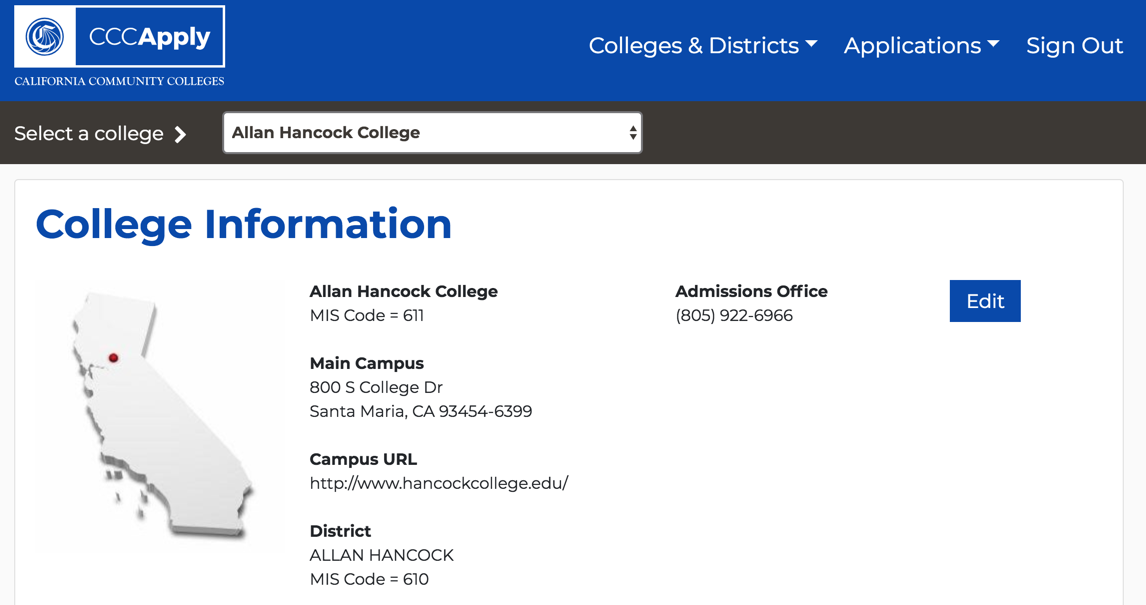
Click Edit to display the Edit College Information dialog box (or the Edit District Information dialog box).

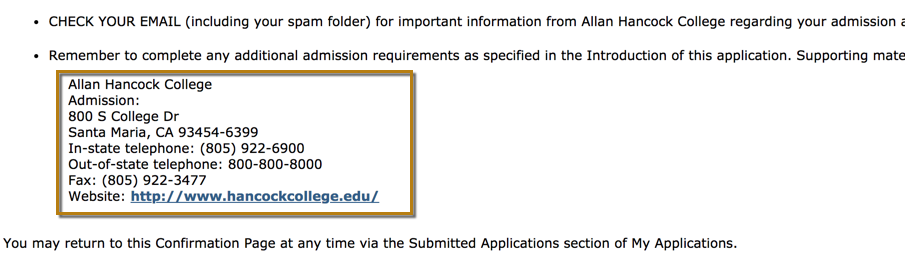
Make edits in the editable fields provided and click Save. The updated information displays on the CCCApply, International, and CC Promise Grant (BOG) applications when the student completes the application.
| Note |
|---|
IMPORTANT: The updated information displays on the CCCApply, International, and CC Promise Grant (BOG) applications when the student completes the application. |
...
Field Label | Required | Meaning / Usage |
|---|---|---|
College Name | Yes | Not editable. Name of the college. |
College MIS | Yes | Not editable. Name of the college |
Street Address 1 | No | Recommended. College main street address. Editable field. |
Street Address 2 | No | Recommended. College alternate street address. Editable field. |
City | Yes | Not editable. City in which the main campus resides. |
Postal Code | Yes | Not editable. Postal code of the college main campus. |
College URLs | No | Recommended. College main website or admissions office URL. |
Admissions Office Contact | No | Recommended. Optional text input field. If populated, this field is merged/used in several ways in the post-submission application process, including:
|
Admissions Office Email | No | Recommended. Optional text input field. If populated, this email address is used in multiple ways in the post-submission application process, including:
|
Admissions Office Phone | No | Recommended. Optional text input field. If populated, this information appears to the applicant on the post-submission confirmation screen. |
Admissions Out-Of-State Phone | No | Recommended. Optional text input field. If populated, this information appears to the applicant on the post-submission confirmation screen. |
Admissions Office Fax | No | Recommended. Optional text input field. If populated, this information appears to the applicant on the post-submission confirmation screen. |
Academic (BOG) Year | Yes | Required. Toggle used to indicate the college's academic year setting for financial aid. |
...
| Note |
|---|
The “term start date” is used to determine the residency determination date (RDD) in the CCCApply Standard Application (only), which is the day before the first day of the term (Start Date), for each term configured by the college. The RDD is used extensively across the CCCApply application to identify data fields/questions that are used in the residency algorithm to determine the “preliminary residency status” for the student upon submission of their application. See the CCCApply Standard & Noncredit Application Specification and Data Dictionary, “Appendix A: Submission Calculation Logic & Residency Algorithm" for details. |
...
Adding a Term
Log into the CCC Administrator -> CCCApply Administrator.
If you are a multi-college district, select the college for which you want to configure terms from the Select a college drop-down list. If your college is not in a multi-college district your college displays by default.
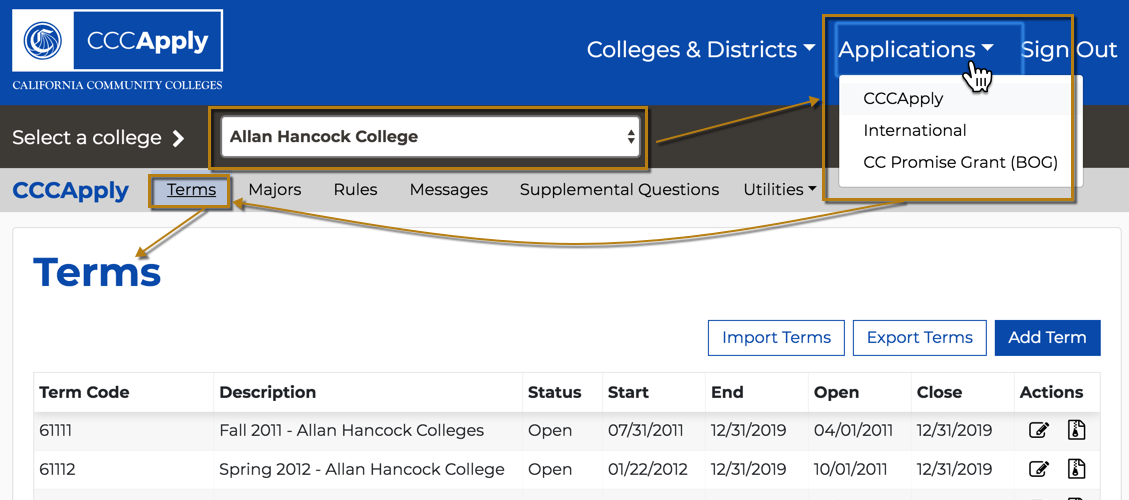
Select either CCCApply or International from the Applications drop-down list.
Click the Terms link to display the Terms Summary table.
Click Add Term to display the Add Term for <Your College> dialog box where you can define the term.
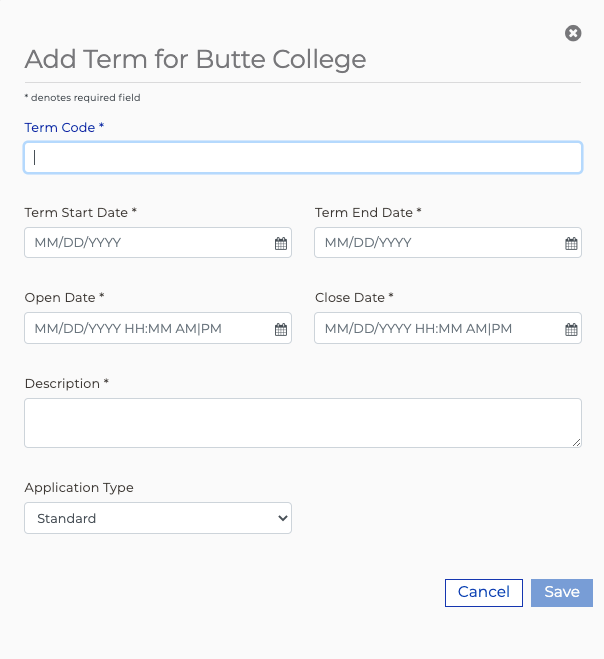
Enter or select values in the fields provided to define the term. Use the Terms Table below as a guide to configuring your values.
Click Save to save the term, close the Add Term dialog box, and return focus to the Terms Summary table with your new term displayed.
Terms Table: Fields & Usage
...
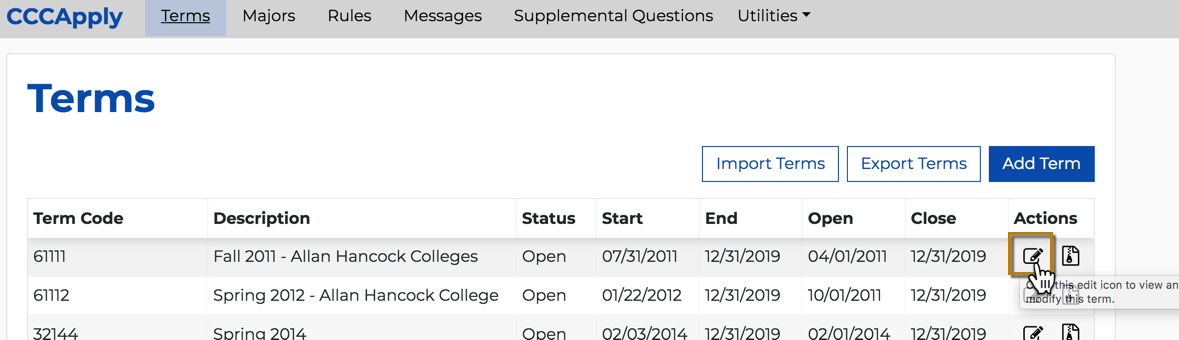
Use the following steps to edit a term.
Select the Edit icon on the row for the term that you want to edit.
...
This opens the Edit Term dialog box.
...
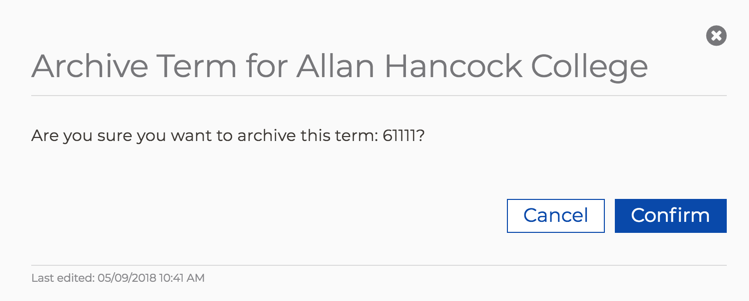
Use the following steps to archive a Term.
Select the Archive icon on the row for the term that you want to edit. This displays the Archive Term dialog box.
Click Confirm to archive the term. The Archive Term confirmation dialog box closes and focus returns to the Terms Summary table where the archived term no longer displays.
| Warning |
|---|
Archiving a Term = Deleting a Term: Remember that archiving terms in CCCApply Administrator renders them inaccessible and should be thought of as the same as deleting them. |
...
Use the following steps to export all terms to a .csv file.
Choose either CCCApply or International from the Applications drop-down list and then click Terms to display the Terms module.
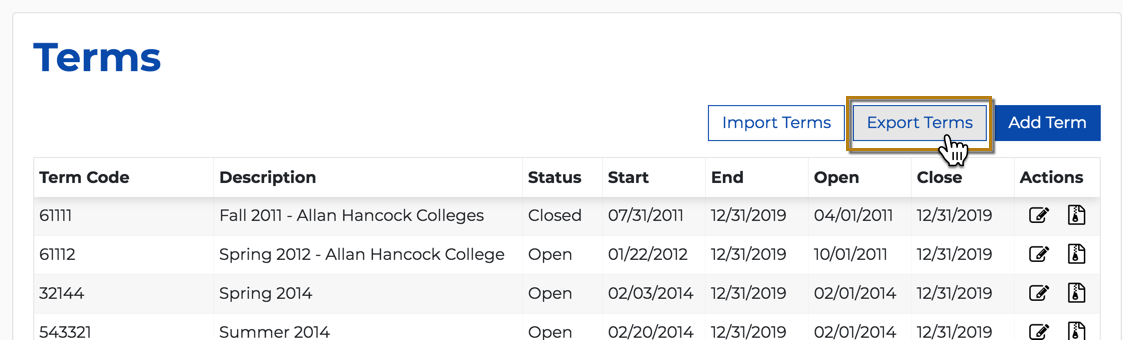
Click Export Terms to display the Export Terms dialog box:
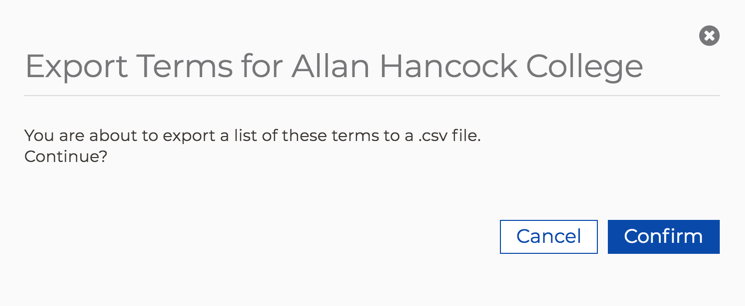
Click Confirm to immediately download an export of all of your terms to a .csv file on your computer’s default download location (i.e. the Downloads folder on a Mac).
Editing the Exported Terms CSV File
The export function produces a .csv file describing the terms, and the import function requires a .csv file in exactly the same format. Unless you have experience with text editors and CSV files, the best way to edit your .csv file may be with a spreadsheet application such as Microsoft Excel or OpenOffice Calc. However, these applications may have default date settings that may apply to dates you enter, so you may have to apply the correct date format (i.e. mm/dd/yyyy hh:mm a) to any new dates and/or times. Remember to save the file in CSV format when you are finished editing it.
Open the downloaded terms .csv file on your computer using the application of your choice (MicroSoft Excel is recommended).
Edit the terms data as needed. It is assumed your intention is to add new terms and/or edit the terms displayed in order to import them for new values for either your CCCApply or International application. Use the table below as a guide.
| Note |
|---|
Standard/Noncredit terms cannot be mixed with International Application terms in the same .csv file at this time. |
Terms CSV File Element | Purpose |
|---|---|
Header row (i.e. row 1 that reads left to right: code, description, start, etc.) | The header row is required in order for your .csv file to import correctly and the values to be stored properly by the CCCApply Administrator. |
Date format | Must be in mm/dd/yyyy format. You may need to apply non-default formatting to date fields you enter in an Excel application to ensure it matches the required format. Simple text editors will likely not apply a default date format to the .csv file, but the display may not be as organized. |
Time format | The time format must be in hh:mm a (or hh:mm p) format. I.e. 07:00 AM or 10:00 PM. |
Once you are done adding/editing terms, save the .csv file using your software’s Save As option.
Edit the file name to be unique and confirm that the file extension displays as .csv.
Your terms .csv file is now ready to be imported.
Importing Terms
You use a .csv file to import terms into the CCCApply Administrator. The easiest way to do this is usually to export the current terms and then edit the file since a header row and some configuration details are required.
...
Use the following steps to import terms.
Have ready an edited .csv file of terms for importing. See Editing the Exported Terms CSV File for details.
From the Terms Summary table, click Import Terms to display…
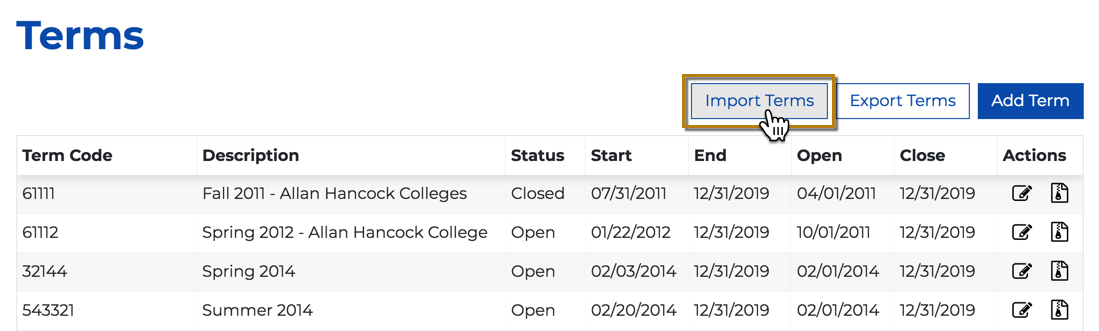
...the Import Terms dialog box: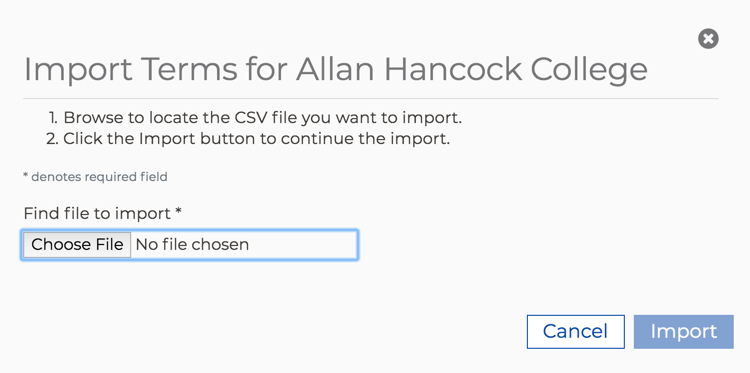
Click Choose File to display your computer’s file navigator.
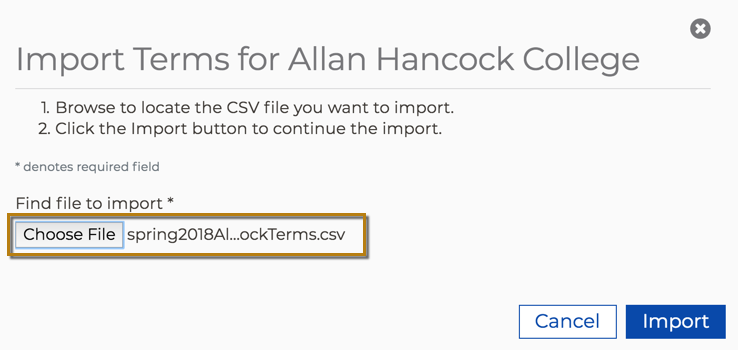
Navigate and select the terms .csv file you want to import. The file name for the file you selected displays next to the Choose File button.
Click Import to import the terms .csv file, close the Import Terms dialog box, and display the Terms Summary table where all rows are replaced/updated and the terms list refreshes to match your imported values.
...
Configuring Majors
The Majors module is where you can add, edit, archive (currently, “archive” functions as a delete in CCCApply Administrator), import, and export majors. The Majors module is available only for the CCCApply Standard, Noncredit, and International applications.
...
CCCApply vs. International Majors: If you choose CCCApply from the Applications drop-down list and define a major, and then select International from the Applications drop-down list, the major you just defined for the CCCApply Standard application will not appear in the Majors table for the International application. If you want a given major to be available on both applications, you must create it separately for each application. Or, you may import the major (or list of majors) into both applications (i.e. you can create majors in one application, export those majors, and then import those majors into the other application).
CCCApply vs. Noncredit Majors: If you choose CCCApply from the Applications drop-down list and define a major, and you want that major to also display for the Noncredit application, you will want to select Both from the Application Type drop-down list in the Major dialog box when manually creating a major. Otherwise the major defaults to Standard application display. As with the International application, you can choose to import the major (or list of majors) into both applications.
To add a major manually:
Log into the CCC Administrator -> CCCApply Administrator.
If you are a multi-college district, select the college for which you want to configure majors from the Select a college drop-down list. If your college is not in a multi-college district, your college displays by default.
Select either CCCApply or International from the Applications drop-down list.
4. Click the Majors link from the modules menu bar to display the Majors table.
...
Use the following steps to edit a major:
Select the Edit icon on the row for the major that you want to edit.
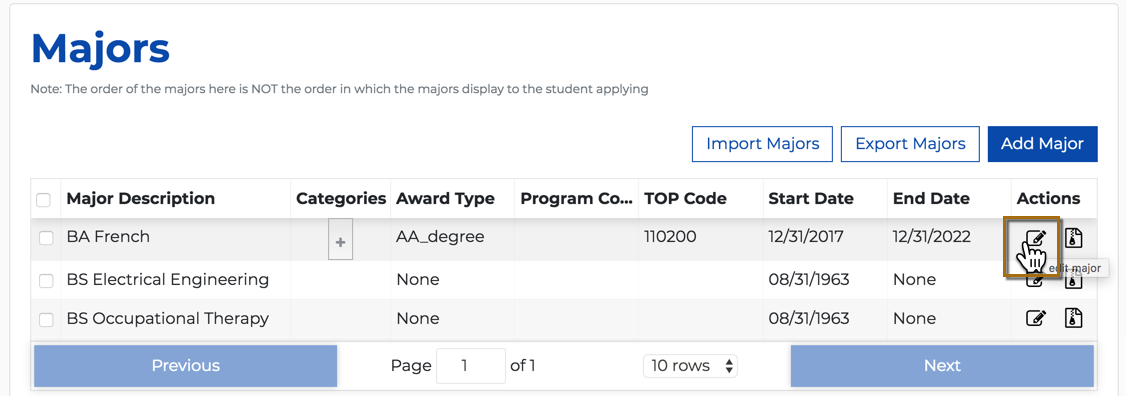
This displays the Edit Major dialog box.Make your edits and click Save to close the Edit Major dialog box and return focus to the Majors table.
Archiving a Major
Archiving majors in CCCApply Administrator 2.0 renders them inaccessible and should be thought of as the same as deleting them. Archive functionality will be extended to be fully functional in a future release.
Use the following steps to archive a major:
Select the Archive icon on the row for the major that you want to edit. This displays the Archive Major confirmation dialog box:
Click Confirm to archive the major. The Archive Major confirmation dialog box closes and focus returns to the Majors table where the archived major no longer displays.
| Note |
|---|
Note: Remember that archiving majors in CCCApply Administrator 2.0 renders them inaccessible and should be thought of as the same as deleting them. |
...
Use the following steps to export majors to a .csv file.
Click the Export Majors button to display…
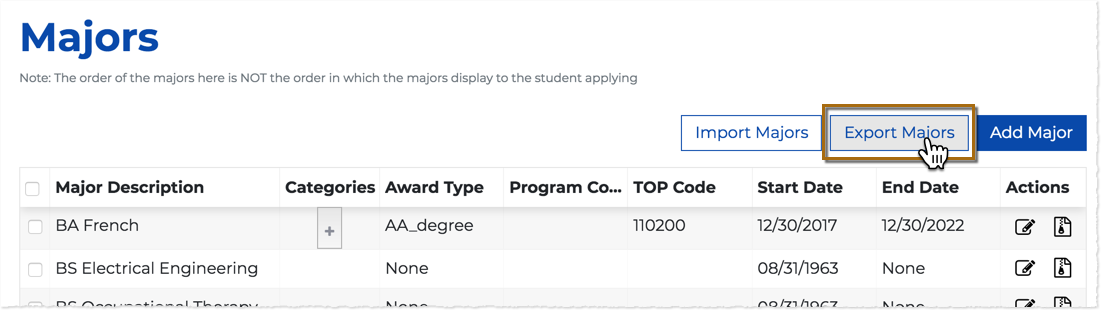
..the Export Majors confirmation dialog box: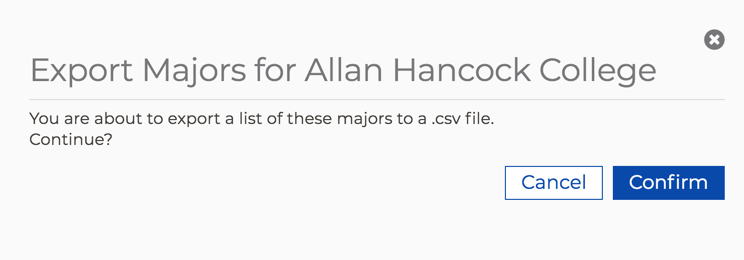
Click Confirm to immediately download an export of all of your majors to a .csv file on your computer’s default download location (i.e. the Downloads folder on a Mac).
Editing the Exported Majors CSV File
The export function produces a .csv file describing the majors, and the import function requires a .csv file in exactly the same format. Unless you have experience with text editors and CSV files, the best way to edit your .csv file may be with a spreadsheet application such as Microsoft Excel or OpenOffice Calc. However, these applications may have default date settings that may apply to dates you enter, so you may have to apply the correct date format (i.e. mm/dd/yyyy) to any new dates and/or times. Remember to save the file in CSV format when you are finished editing it.
Open the downloaded majors .csv file on your computer using the application of your choice (Excel or another spreadsheet program is recommended).
Edit the majors data as needed. It is assumed your intention is to add new majors and/or edit the majors displayed in order to import them for new values for your CCCApply application(s). Use the table below as a guide.
Once you are done adding new majors and/or editing the majors, save the file using your software’s Save As option.
Edit the file name to be unique and confirm that the file extension is .csv.
Your majors .csv file is now ready to be imported.
CSV Column Heading | Required | Important Configuration Notes | ||||
|---|---|---|---|---|---|---|
Header Row | YES | IMPORTANT: The header row is required in order for your .csv file to import correctly and the values to be stored properly by the CCCApply Administrator. | ||||
Application | YES |
| ||||
Major Code | YES |
| ||||
Major Description | YES |
| ||||
Category | NO |
| ||||
TOP Code | NO |
| ||||
Program Control Number | NO |
| ||||
Award Type (AwardType) | YES | The Award Type (AwardType) field values are slightly different in the new Admin 2.0 system. The following notes pertain to implementing this field in the new system:
| ||||
Application Type | NO |
| ||||
CIP Code | NO |
| ||||
Education Goals (eduGoals) NOT APPLICABLE in this version | NO | Leave this column in place and leave it empty.
| ||||
Start Date | YES |
| ||||
End Date | YES |
| ||||
Create Date | NO |
|
...
Use the following steps to import majors.
Using the exact format that Have ready an edited .csv file of majors for importing. See /wiki/spaces/PD/pages/758546724 for details.
Select either CCCApply or International from the Applications drop-down list.
From the Majors module, click Import Majors to display…
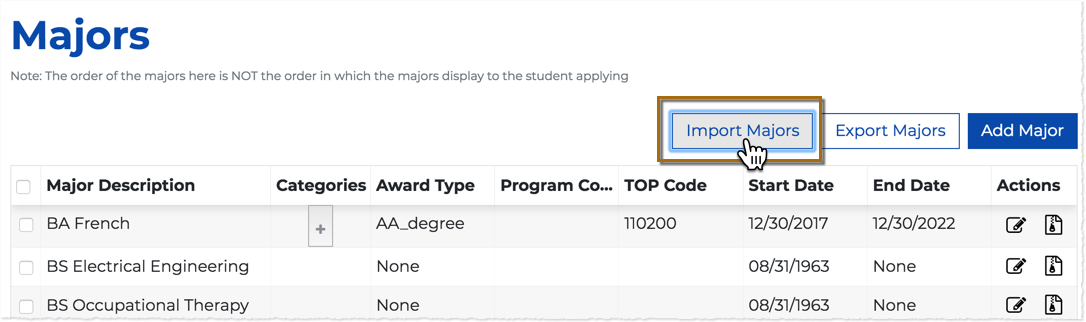
...the Import Majors dialog box.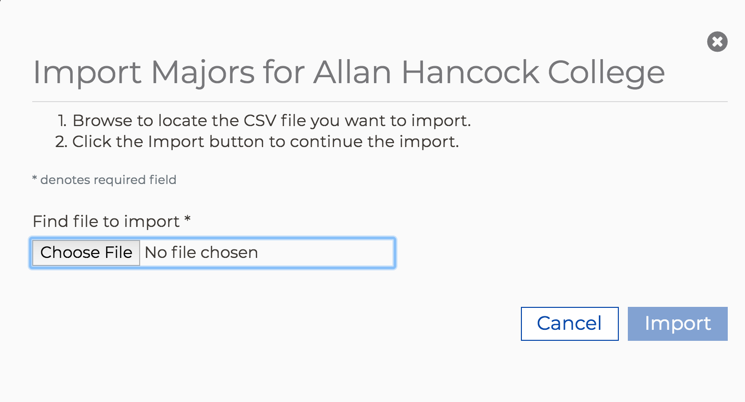
Click Choose File to display your computer’s file navigator.
Navigate and select the majors .csv file you want to import. Ensure that, if you selected CCCApply or International in step 2 above, you select the correct application majors .csv file. After selecting your .csv file, the file name displays next to the Choose File button.
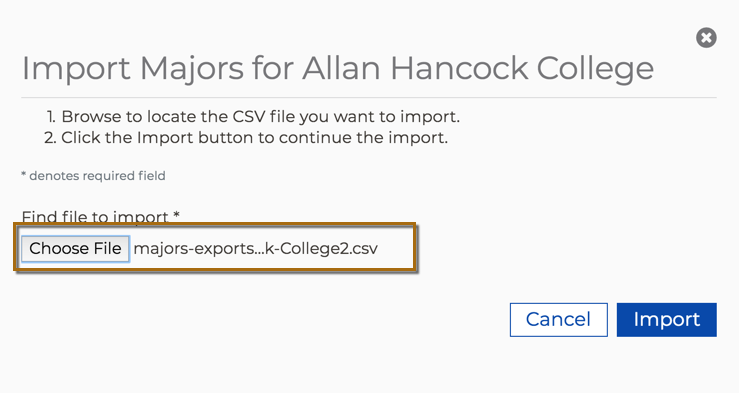
Click Import to import the majors .csv file. The Import Majors dialog box closes automatically, and the Majors table displays with all rows updated and and refreshed to display your edited and new major values.
How Your Majors & Programs Display in the CCCApply Applications
...
To get started colleges should complete the The Major Category Implementation Worksheet, which provides a comprehensive step-by-step guide for setting up the Major Category field in CCCApply.
...
Use the following steps to configure English Proficiency values for your college.
Log into the CCC Administrator -> CCCApply Administrator.
If you are a multi-college district, select the college for which you want to configure majors English Proficiency from the Select a college drop-down list. If your college is not in a multi-college district your college displays by default.
Select International from the Applications drop-down list.
Click the English Proficiency link to display the English Proficiency table.
Enter help text in the English proficiency help text field to provide instructions to the student that will display in the CCCApply International application. The text instructions inform the students of:
what their specific English proficiency requirements are for your college (i.e., which tests are accepted and which tests will appear in the CCCApply International application’s Proficiency Test/Qualification dropdown list)
which non-test requirements are accepted (i.e. native English speaker or previous attendance at an English language school, etc.)
6. Select a check box for one or more English Proficiency Types.
...
Use the following steps to create a new rule.
Log into the CCC Administrator -> CCCApply Administrator.
If you are a multi-college district, select the college for which you want to configure rules from the Select a college drop-down list. If your college is not in a multi-college district your college displays by default.
Select either CCCApply or International from the Applications drop-down list.
Click the Rules link to display the Rules table.
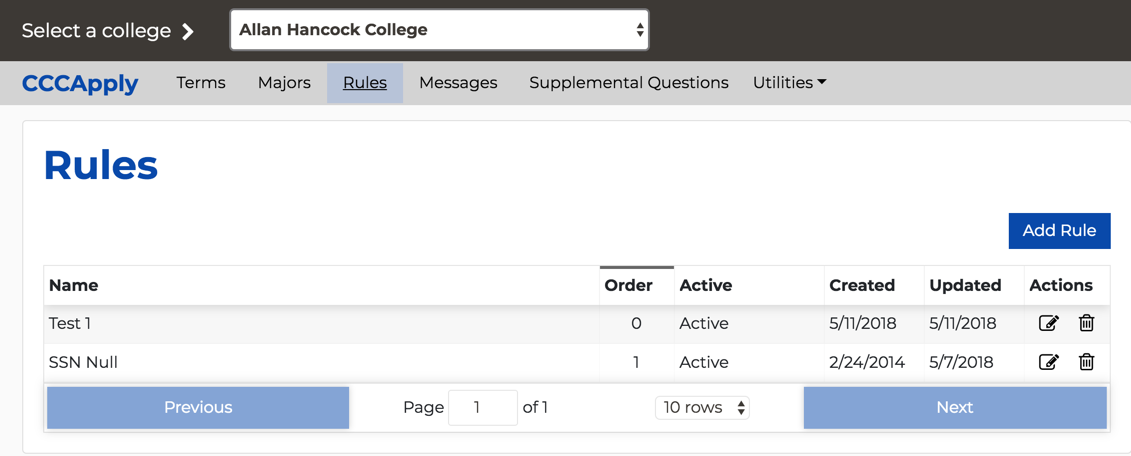
Click Add Rule to display the Add Rule dialog box for your college.
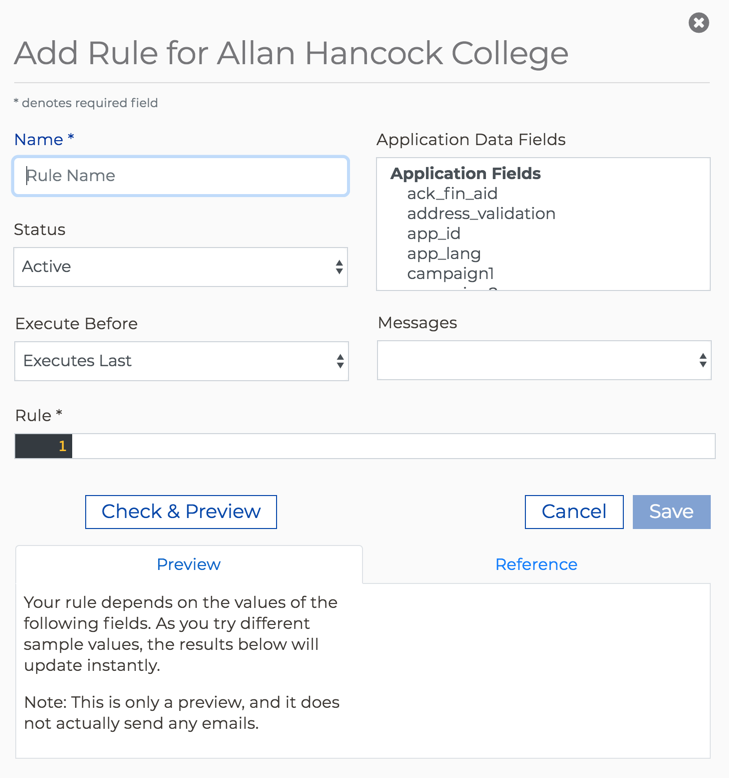
Enter a name for your rule in the Name field. The name must be unique among the other rules you have created.
Select either Active or Inactive from the Status drop-down list.
Active means that it should run every time a student submits an application.
Inactive means that the rule should not run.
Use the Executes Before drop-down menu to set the execution order for your rule relative to your other rules. If your new rule should execute after all other rules, select Executes Last.
Begin writing your rule In the Rule field. It is at this point that a proficiency in writing computer software will be most helpful, as rules are written in a computer programming language similar to C or JavaScript.
| Note |
|---|
Note the key words of “mail,” “staffmail,” and “error” in the table below. |
...
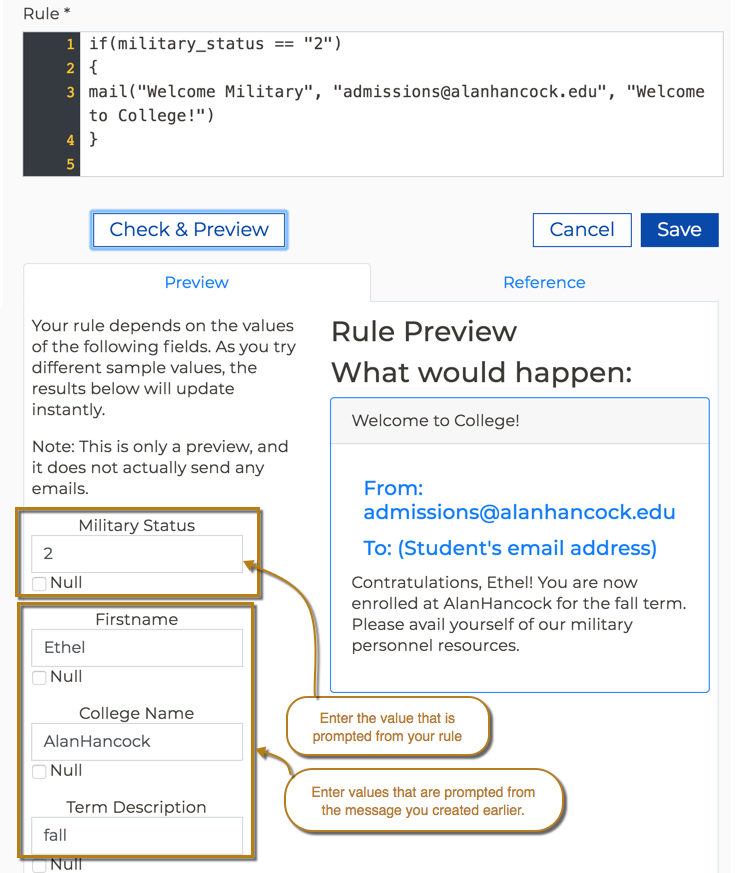
In this example we’ll write our rule to check the "military_status" field for a submitted application, and send the email when the field contains the value "2". For the purposes of this example, the message ID for the email is "Welcome Military" (see Prerequisite, above).
Enter (or copy/paste) the following rule text in the Rule field:
if(military_status == "2")
{
mail("Welcome Military", "admissions@yourCollege.edu", "Welcome to College!")
}Note that the keyword “mail” is followed by a parenthetical, comma-separated statement consisting of the Message ID in quotes, the “from” email value (for your college), and the email subject text.
| Note |
|---|
Note: You can either select the message ID from the Messages drop-down list to get it to display in the Rule field at the cursor, or - if you know the message ID - you can simply type it. |
...
In the example below, the rule would do nothing if "military_status" contained a value other than "2".
Changing the "military_status" field to a value of "2" causes the preview to change, presenting the details of the action that will be taken.
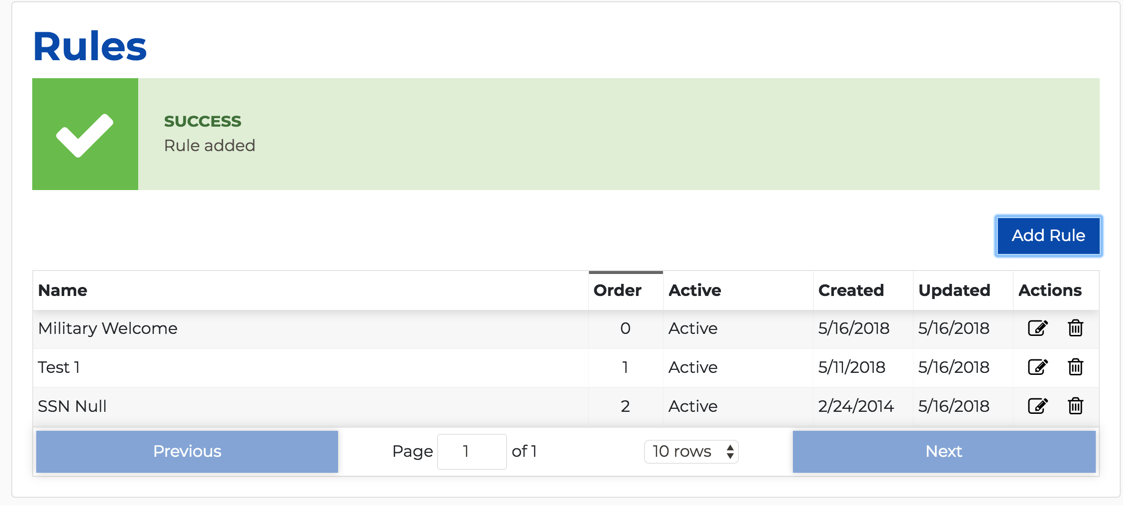
Once you’re satisfied with your rule’s preview, click Save to save the rule, close the Add Rule dialog box, and display your saved rule in the Rules table.
After a caching delay of 30 minutes you can then submit a test application in your Pilot environment that meets the requirements for triggering the email in order to test it and see the result.
For a student who indicates active military status in their CCCApply application, this rule will send him/her an email with the subject line of "Welcome to College!" and a "from" address of "admissions@alanhancock.edu". The body of the email will be the content of the "Welcome Military" message.
Creating an Error Message Rule Example
Use the steps below to create a rule to display an error/warning message in the application reminding the student that they need to supply their SSN number in order to apply for financial aid.
Enter (or copy/paste) the following rule text in the Rule field:
if(ssn == null)
{
error("Warning: You must provide your social security number to apply for financial aid. Please confirm this is your intent.")
}Note that the keyword “error” is followed by a parenthetical statement consisting of the error message text you want to display based on the “if” condition.
Click Check & Preview to validate the rule and to display any parameterized fields.Select the Null check box to display a preview of the error message:
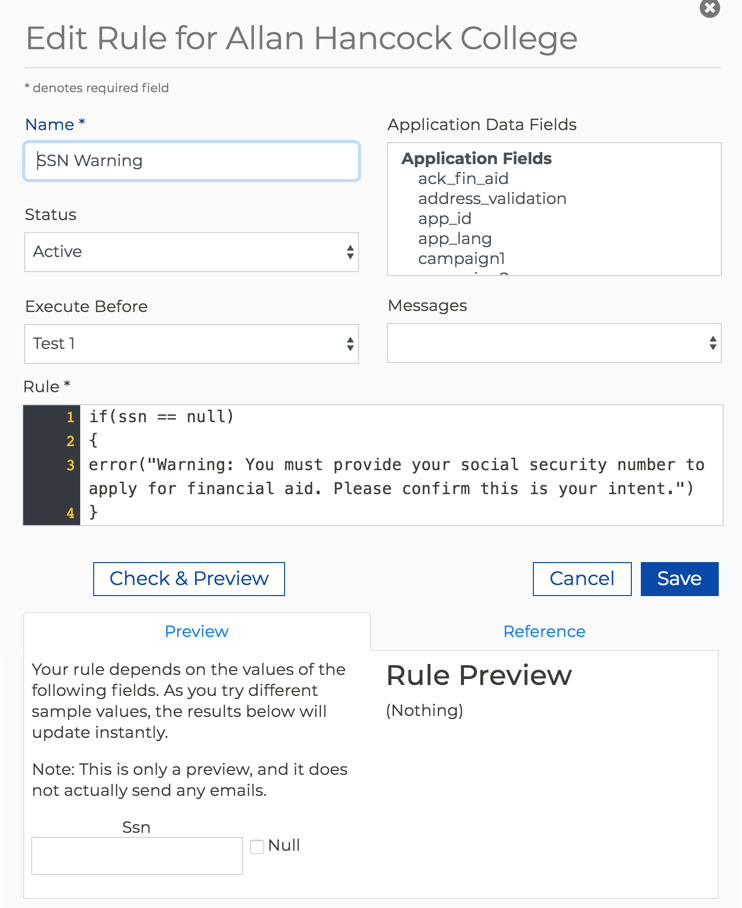
Note that the Rule Preview shows (Nothing) since the conditions for the warning message to display are not yet met (i.e. snn == null).Select the Null check box to display a preview of the error message:

Once you’re satisfied with your rule’s preview, click Save to save the rule. The Add Rule dialog box automatically closes and your saved rule displays in the Rules table.
After a caching delay of 30 minutes you can then submit a test application in your Pilot environment that meets the requirements for triggering the error message in order to test it and see the result.
For a student who has not provided their SSN number in their CCCApply application the following error message displays when they click Submit my Application:
...
Editing a Rule
Use the following steps to edit a rule.
Select the Edit icon on the row for the rule that you want to edit.
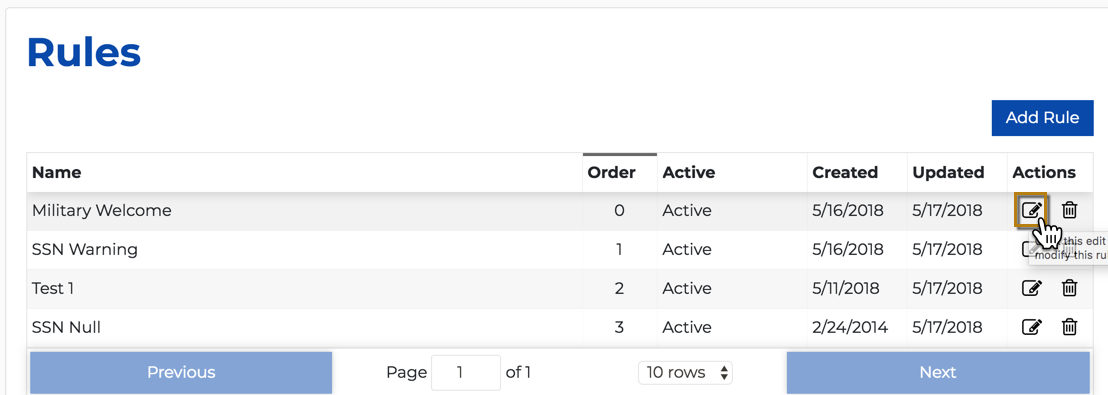
This displays the Edit Rule dialog box.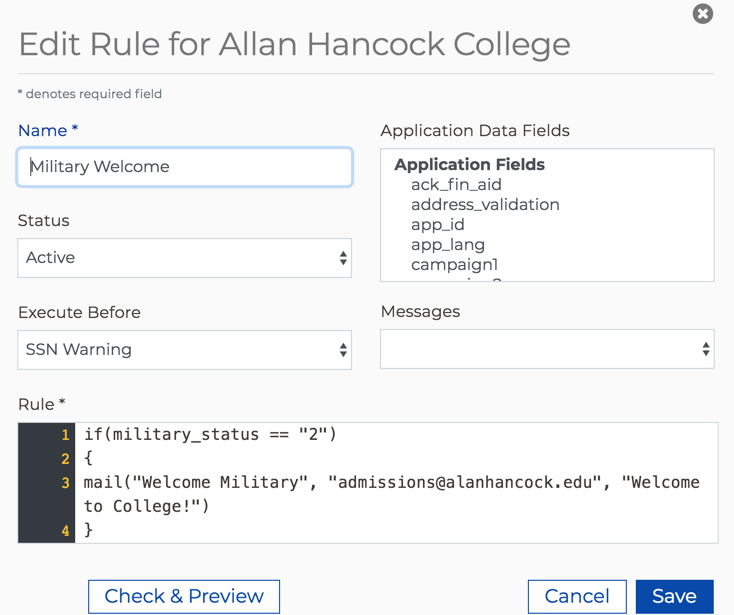
Make your edits and click Save to save your changes. The Edit Rule dialog box automatically closes, and focus returns to the Rules table.
...
Configuring Messages for Rules
...
Use the following steps to create a message in the Messages module.
Log into the CCC Administrator -> CCCApply Administrator.
If you are a multi-college district, select the college for which you want to configure messages from the Select a college drop-down list. If your college is not in a multi-college district your college displays by default.
Select either CCCApply, International, or CC Promise Grant from the Applications drop-down list, depending on which application you want to create messaging for.
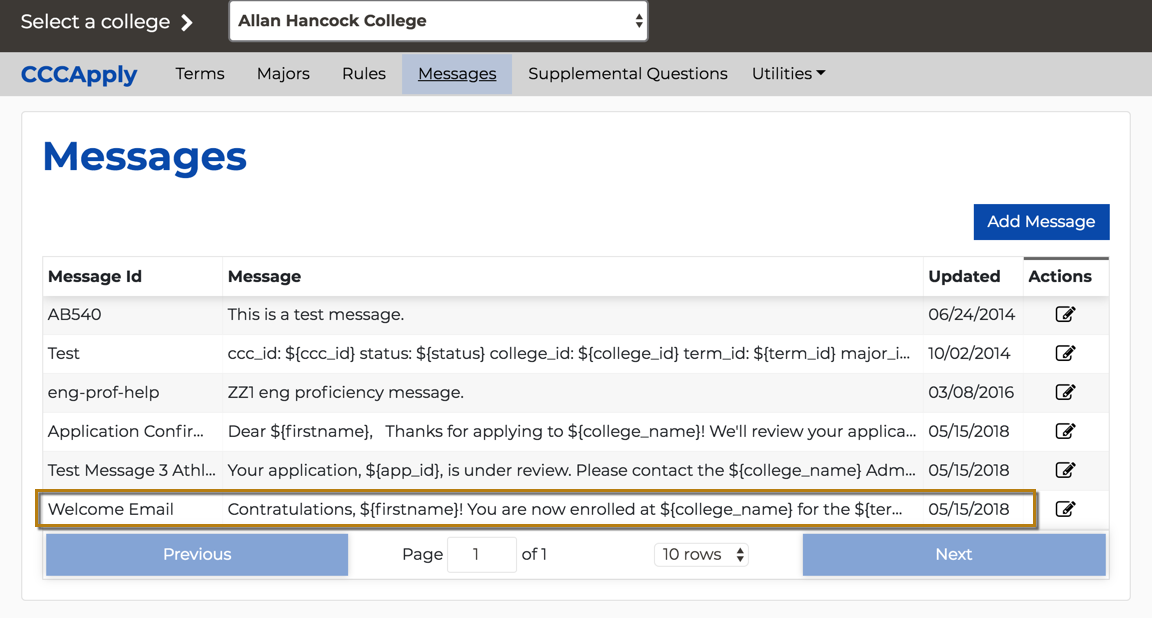
Click the Messages link to display the Messages Summary table.
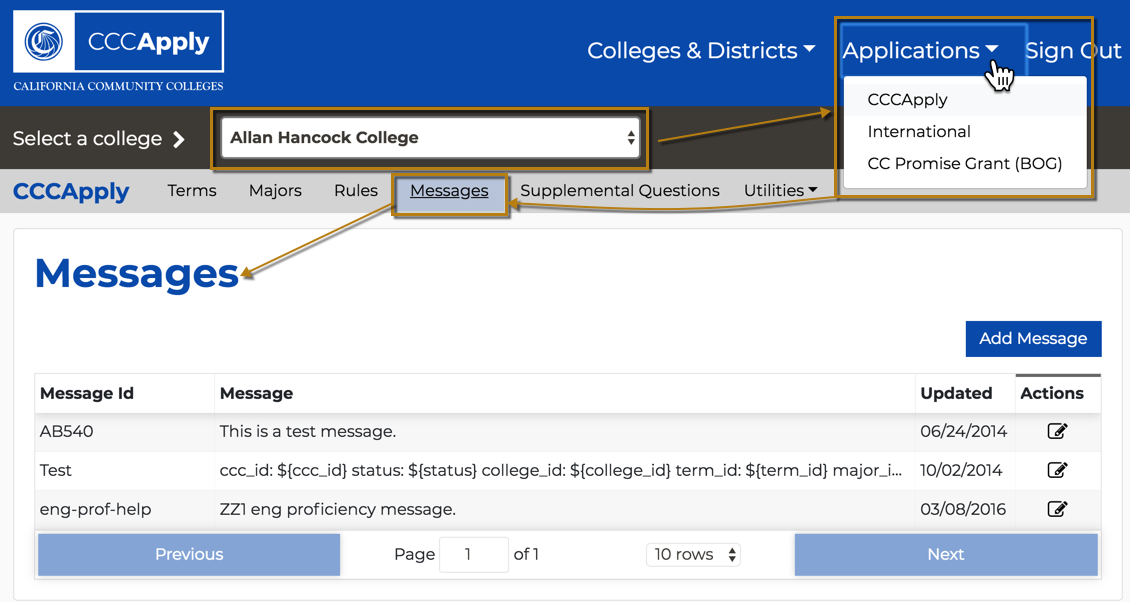
Click Add Message to display the Add Message for <Your College> dialog box where you can define the message.

Enter a message name in the Message ID field. You will use this name to associate the message with its corresponding rule and it displays in the Add Rule dialog box and the Edit Rule dialog box in the Messages drop-down list.
Note: The name must be unique among the other messages you’ve created. The maximum name length is 50 characters: letters, numbers, spaces, and any special symbols available on a typical computer keyboard are allowed.
Write your message body in the large Message Content field. The controls for this field are similar to the controls for common word processors (text formatting, images, links, etc.).
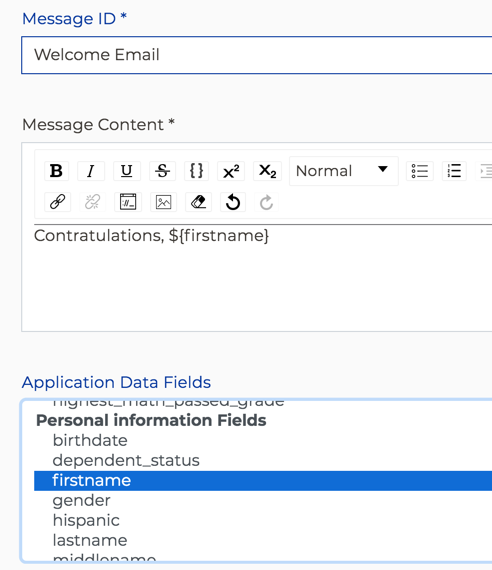
Use the scrollable Application Data Fields to select field names from the student application to include the student's responses in your email.
When you place the cursor in the Message Content field and then click a field in the Application Data Fields list, the field name displays in the Message Content field (the email body) prefaced by a $ symbol and surrounded by curly braces ({}). This is a placeholder that indicates the position where the corresponding application input from the student will appear in the message.
| Note |
|---|
Note: If you prefer typing to clicking, you can type the placeholders manually. Use the same format, "${fieldname}", as shown in the sample message images below. |
To create a sample message, follow these steps:
In the Message ID field, type: Welcome Email
In the Message Content field, type: Congratulations,
Then, leaving a space after the comma, scroll (don’t click) through the field names in the Application Data Fields field group until you find firstname, and click it. Note that ${firstname} appears in the Message Content field where your cursor was located.
In the Message Content field, type: ! You are now enrolled at
Then, leaving a space after the “at” scroll (don’t click) through the field names in the Application Data Fields field group until you find college_name and click it. Note that ${college_name} appears in the Message Content field where your cursor was located.
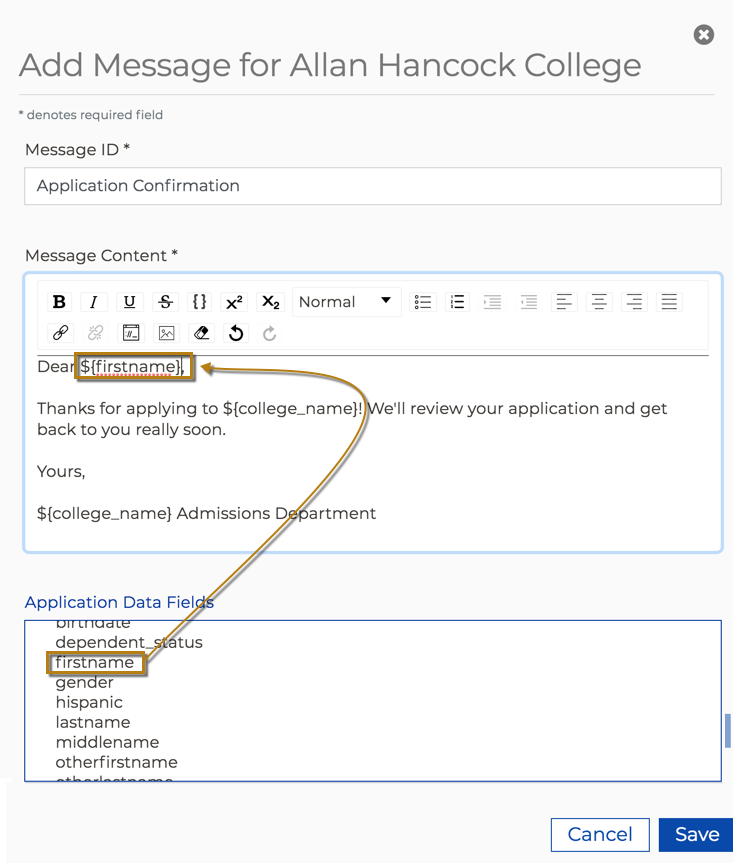
In the Message Content field, type: “for the” without the quotes.
Then, leaving a space after the “ for the ” scroll (don’t click) through the field names in the Application Data Fields field group until you find term_description and click it. Note that ${term_description} appears in the Message Content field where your cursor was located.

In the Message Content field, type: term. Your completed message should now display as in the image below:
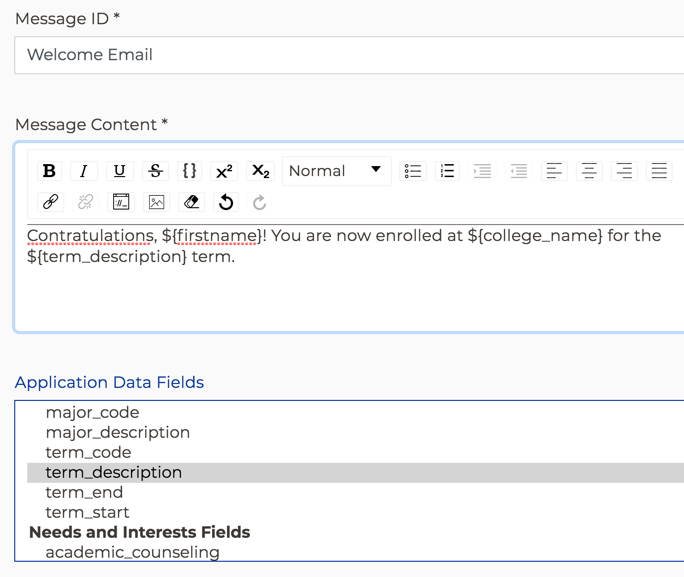
With this message in place, consider an example student named Ethel who has applied to Allan Hancock College for the Fall 2018 term. A rule that uses this message will email a student named Ethel with this body text: "Congratulations, Ethel! You are now enrolled at Allan Hancock College for the Fall 2018 Term."When you are satisfied with the contents of your email, click Save. The Messages Summary table redisplays, now including your new message.
Editing A Message
Use the following steps to edit a pre-existing message in the Messages module.
Select the Edit icon on the row for the message that you want to edit. This displays the Edit Message dialog box:
Make your edits and click Save to close the Edit Message dialog box and return focus to the Messages Summary table.
| Note |
|---|
Note: You can change the Message ID, but remember that you must also update your rules to use the new ID. |
...
| Warning |
|---|
Warning: Your import file must contain all of your supplemental questions, not only those you want to add. Do not import a file that contains only the questions you wish to add to an existing set of questions. This will cause all of the existing questions to be over-written. Instead, export your existing supplemental questions to a file, add your new questions to that file, and then import it. |
Log into the CCC Administrator -> CCCApply Administrator.
If you are a multi-college district, select the college for which you want to configure majors from the Select a college drop-down list. If your college is not in a multi-college district your college displays by default.
Select CCCApply from the Applications drop-down list.
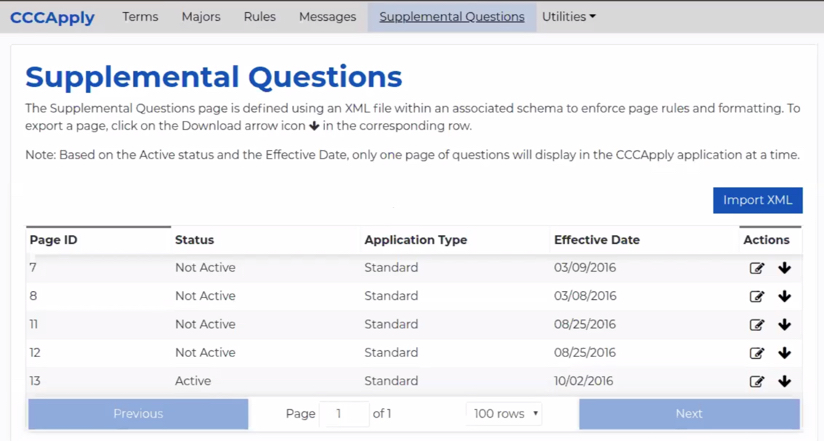
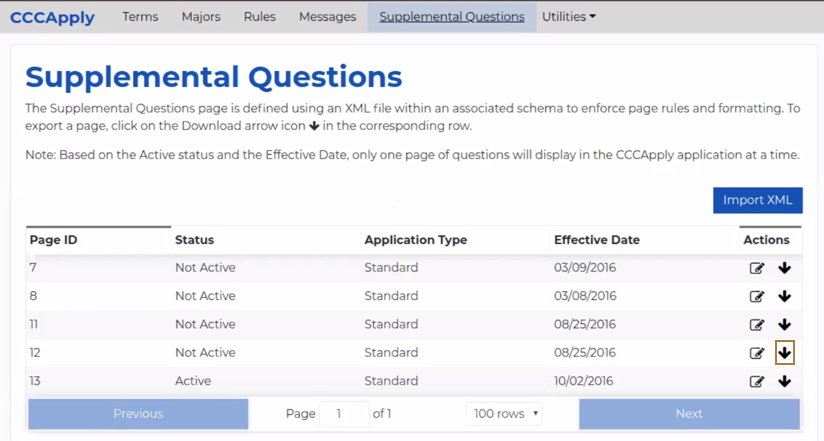
Click the Supplemental Questions link to display the Supplemental Questions Summary table.
Click Import XML to display the Import Supplemental Questions dialog box.

Click Choose File to navigate to your supplemental question XML file. The Import button becomes enabled once you have selected a file.
Follow the onscreen instructions and click Import to import your supplemental questions.
A success message displays for correctly-formatted and imported XML files.
The Supplemental Questions Summary table will redisplayed, now including an entry for your newly-imported questions. A page ID will be assigned to your uploaded file. If you later export this set of questions, this page ID will be part of the output file name.
If your XML file is not formatted correctly (invalid), then an error message displays notifying you. You must validate your supplemental questions XML file against the cccSuppQuesTypes.xsd file here.
Updating Status And Effective Date
Use the following steps to edit a supplemental question set in order to change its effective date and/or its status.
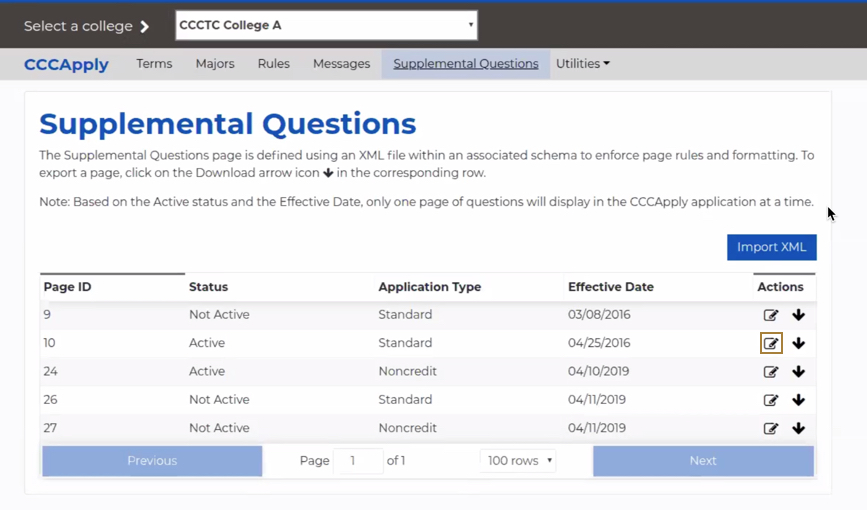
Click the Edit icon on the row for the supplemental question set you want to edit.
This displays the Edit Supplemental Question dialog box.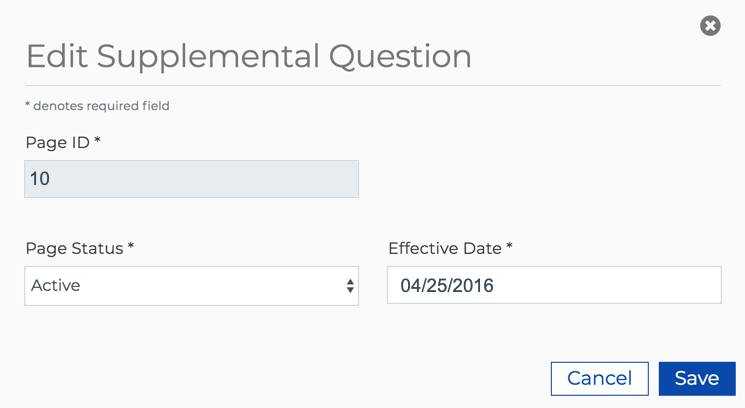
Edit the page status (active or not active) and/or the Effective Date value. The Effective Date field value must be a future date
Click Save to save your changes. The Edit Supplemental Question dialog box automatically closes, and focus returns to the Supplemental Questions Summary table.
Downloading Your Supplemental Question XML Set
Use the following steps to export an XML supplemental question set. You may want to do this in order to edit the XML and then re-import it as a new/edited set of supplemental questions.
Select the Download icon on the row the supplemental question set you want to download (only one page can be downloaded at a time).
The Export Supplemental Question dialog box displays.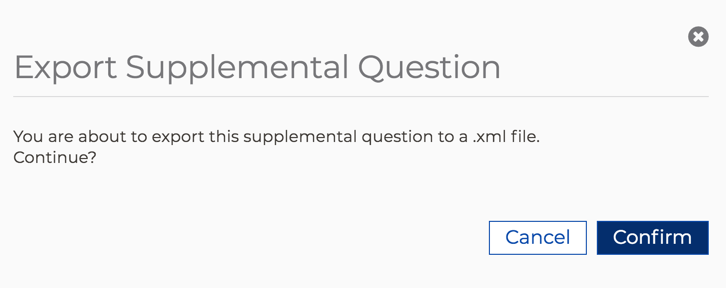
Click Confirm to export/download the XML supplemental question file to your computer’s default download location. The default name of the downloaded file incorporates the page ID and effective date, i.e. the supplemental question set with an ID of 502 and effective date of 5/9/18 has a file name of: supp-611-502-20180509.xml.
Use a text editor or XML editor to edit the file as needed. You can then validate the file and import it and have a new, updated supplemental question set.
...
Using the Utilities
The Utilities module contains:
...
Prerequisite: Your college must be integrated with the CCC IdP Proxy In order to use the SPAM filter.
Log into the CCC Administrator -> CCCApply Administrator.
If you are a multi-college district, select the college for which you want to check SPAM from the Select a college drop-down list. If your college is not in a multi-college district your college displays by default.
Select either CCCApply or International from the Applications drop-down list.
Click the Utilities drop-down list and select Spam Filter to display the SPAM Filter Summary table.
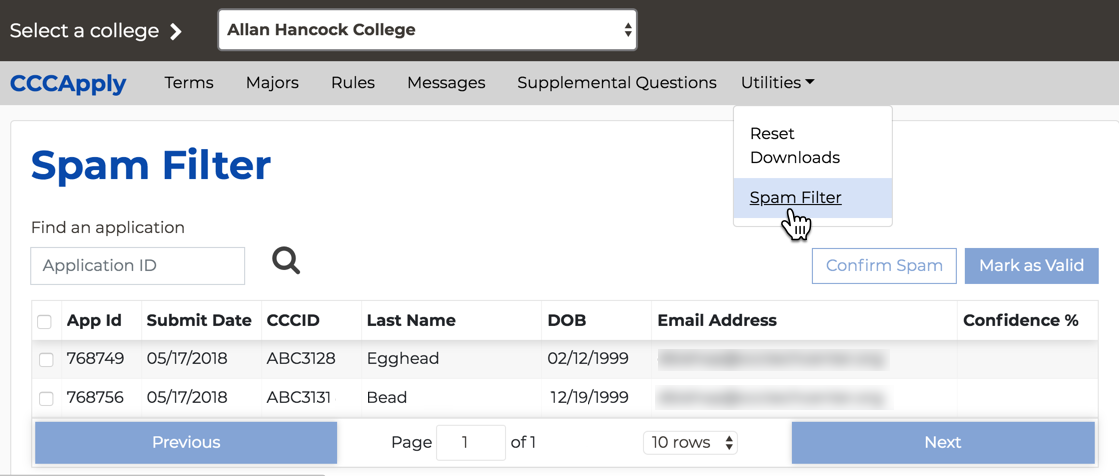
Any potentially fraudulent applications display with some details including a Confidence % value indicating the machine learning algorithm’s analysis of how likely the application is to be fraudulent.
Note: If you have a specific application that you want to mark as spam or validate as not spam, you can enter the application ID in the Find an application search field to find it. You can look up and retrieve previously-downloaded applications and mark them as valid or fraudulent.Use the CCCApply Report Center to view any application in greater detail if you are unsure if it is valid or SPAM.
Select the check box for the row of any application you want to mark as SPAM or valid to enable the Confirm Spam and Mark as Valid buttons.
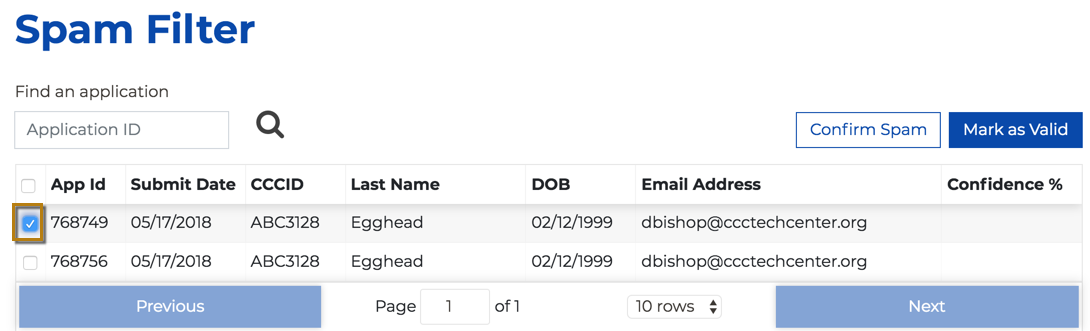
Click the:
Confirm Spam button to mark the application as SPAM. The machine learning algorithm will incorporate the application’s details to help it identify future fraudulent applications.
Mark as Valid button to mark the application as legitimate so that it can be submitted and available for download using the Download Client.
SPAM Email Alerts
SPAM email alerts are automatically sent to the Admissions Office Email you entered in the College Information module. Two email alerts will be sent to your Admissions Office email:
...
Use the following steps to reset many applications at once.
Log in to the CCCApply Report Center and run the New Applicant report.
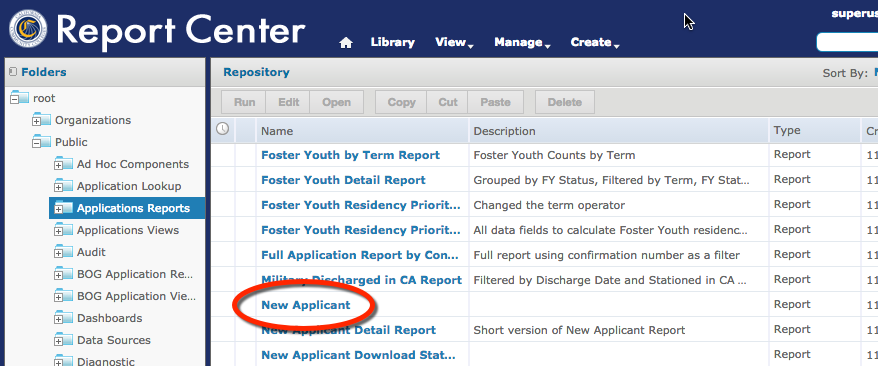
Export the report to a .csv file.
Open the .csv file with a spreadsheet application.
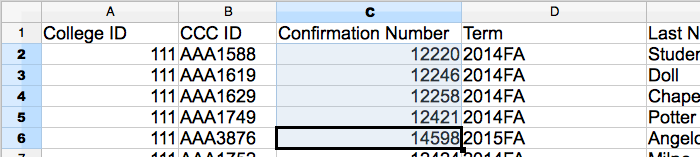
Copy confirmation numbers from the spreadsheet and paste them into the Reset Downloads module input field. Multiple confirmation numbers can be separated by commas (i.e. 768756, 123456), spaces (i.e. 768756 123456), or by new line, i.e.:
768756
123456
| Note |
|---|
You can enter one confirmation number at a time, or you can modify the spreadsheet to bring them all together so you can copy/paste all of them at once. You will not need the Excel file after you have copied the confirmation numbers you want, so there is no need to be particularly careful with it. |
...