This page provides a step-by-step guide for creating a new account with OpenCCC 2.0.
Sections:
About Account Creation
What is an OpenCCC account and why do students need one?
OpenCCC is the California Community Colleges federated identity initiative, which includes a student account system that assigns each user a unique California Community Colleges ID number (CCCID) and allows access to systemwide web-based technology applications via one common single sign-on account.
What information do students need to create a new account?
To create an account, students need an email address and mobile phone number or a unique email address to start the new account, whichever they prefer to validate their identity. Once the user can retrieve and validate their verification code, only a few other details are required to complete the account process, including:
Name & Address
Birthdate
Secure password
These are the only details required to create a new OpenCCC account. Additional information may be needed to submit an application for admission or a financial aid application.
Where do students go to create their account?
Since an OpenCCC account is required to apply to a California Community College using CCCApply, most students will begin the account creation process the first time they apply for admission. Even high school students, applying for the first time, or even exploring careers with Career Coach, are required to create an OpenCCC account. All students and potential students are required to create an OpenCCC account before they can sign in to any CCC systemwide technology application.
How long does it take to create an account?
The simple, mobile-friendly account creation process is designed to be clean, clear, and convenient - allowing users to create & validate a new account and complete their profile in under 7 minutes.
More questions related to the new account system
I think I already have a CCCID. Do I need to create another new account in the new system?
How do I sign in with my existing (legacy) account?
What’s the difference between the legacy and the new OpenCCC?
Can legacy users still use their original Account?
Steps for Creating a New Account
A new account can be created in just three easy steps: 1) Choose a preferred method to obtain your account security code to validate your identity; 2) provide a few required details needed for your record; and 3) set up a secure Password to ensure account recovery, if needed. That’s it!
Step 1: Create & Verify Your Account
Start on the Sign In page.*
Select the Create An Account link below the Email or mobile phone input field. The Create Your Account page will display.

3. Enter a unique Mobile Phone number in the input field then
4. Click the Text My Verification Code button to begin the process of validating your identity. If your mobile phone number is unique, a verification code will be sent to you in a text message.
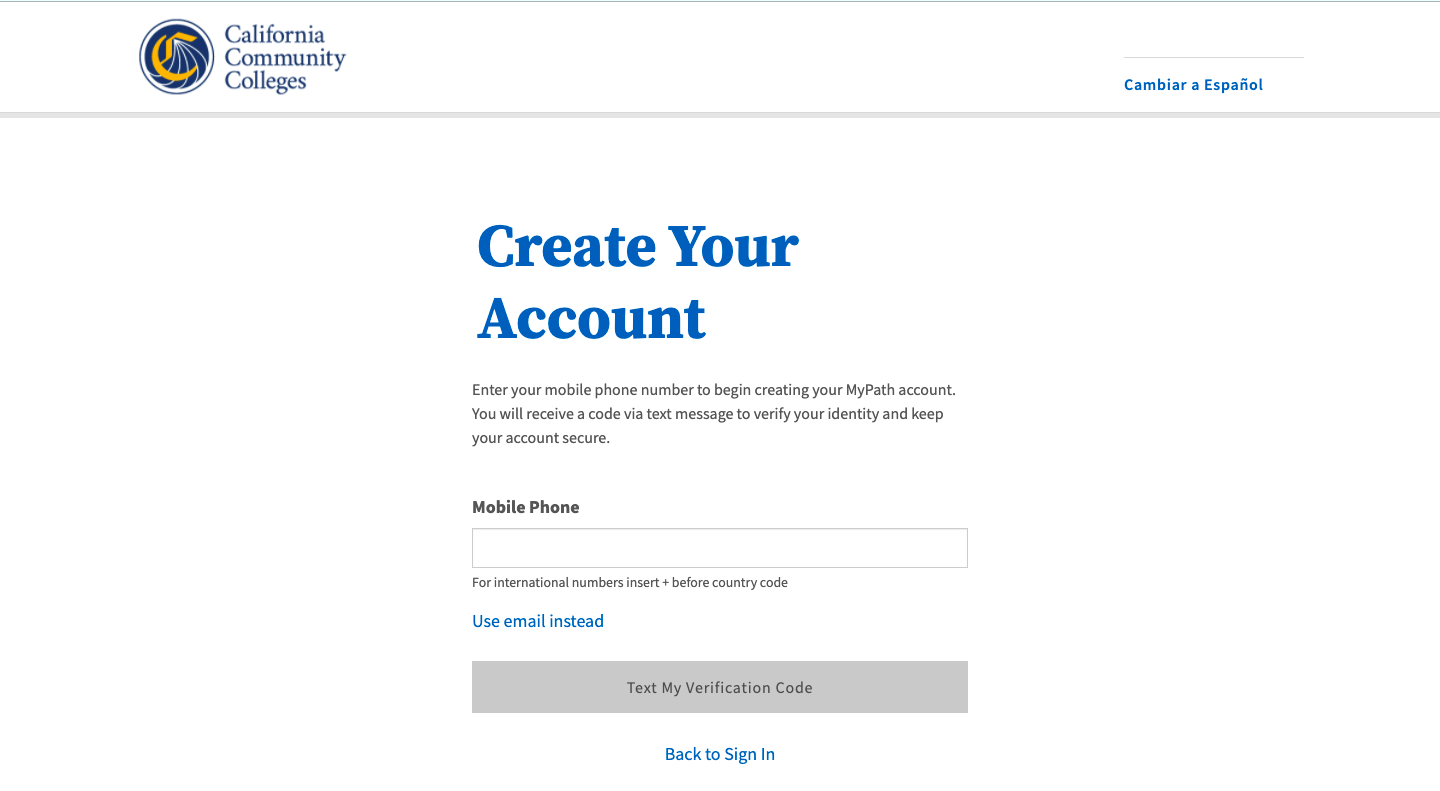
If your mobile phone number is not unique or if your primary phone is a landline, you can try again or switch to the other method by selecting Use email instead link.
The page will refresh with the Email input field.
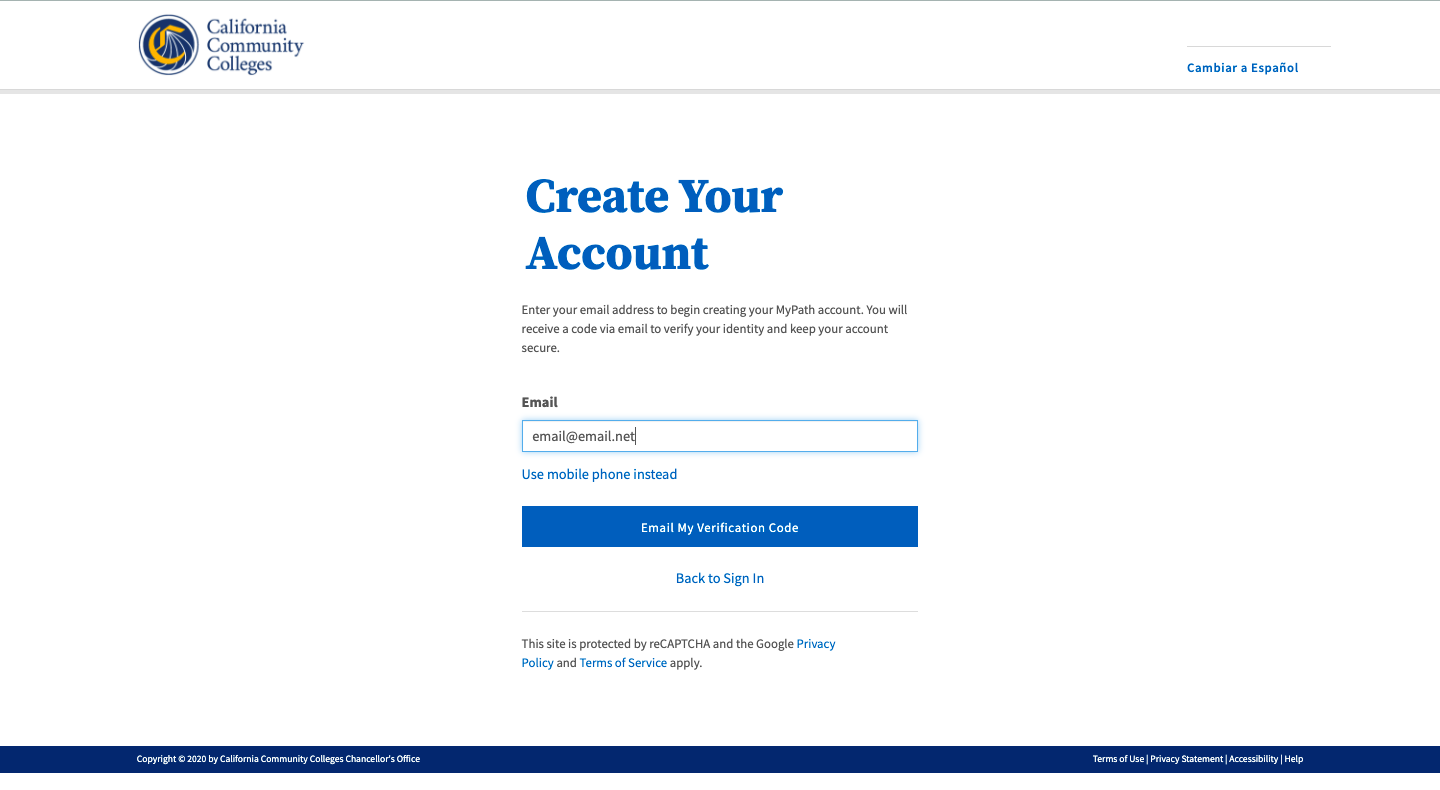
Option: If your primary phone is a landline phone or your mobile phone number is not unique to you, select the Use email instead link to use your email address for validating your identity.
Below: Screenshot of the Create Your Account page with the Email input field.
Next: The Verify Your Account page should be displayed.
5. Retrieve your security code from the message sent to your mobile phone or email account.
For security purposes, two-factor validation is used to verify your identity. A time-sensitive, six-digit validation code will be sent to the user through their preferred method of contact. The code must be retrieved and used within 10 minutes of requesting your code. Below is an example of the verification code message received by email.
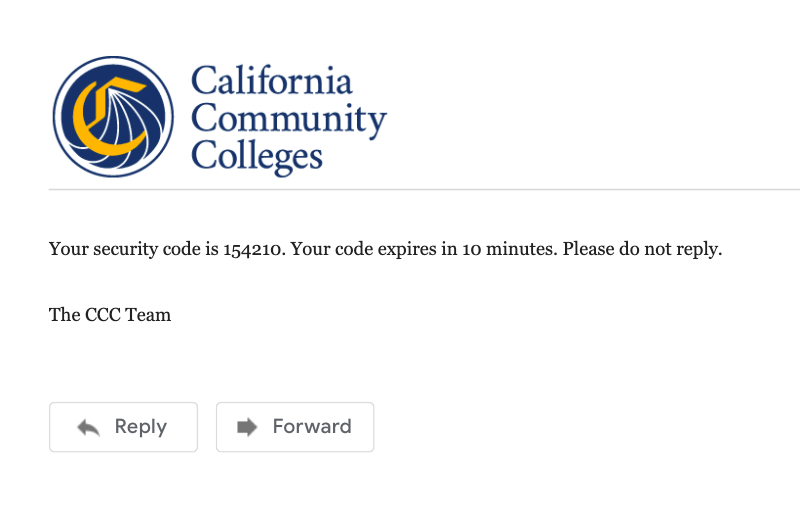
Reminder: The verification security code is time-sensitive and must be retrieved and entered on the Verify Your Account page within 10 minutes of receipt.
6. Enter your six-digit security code in the Verification Code on the Verify Your Account page.
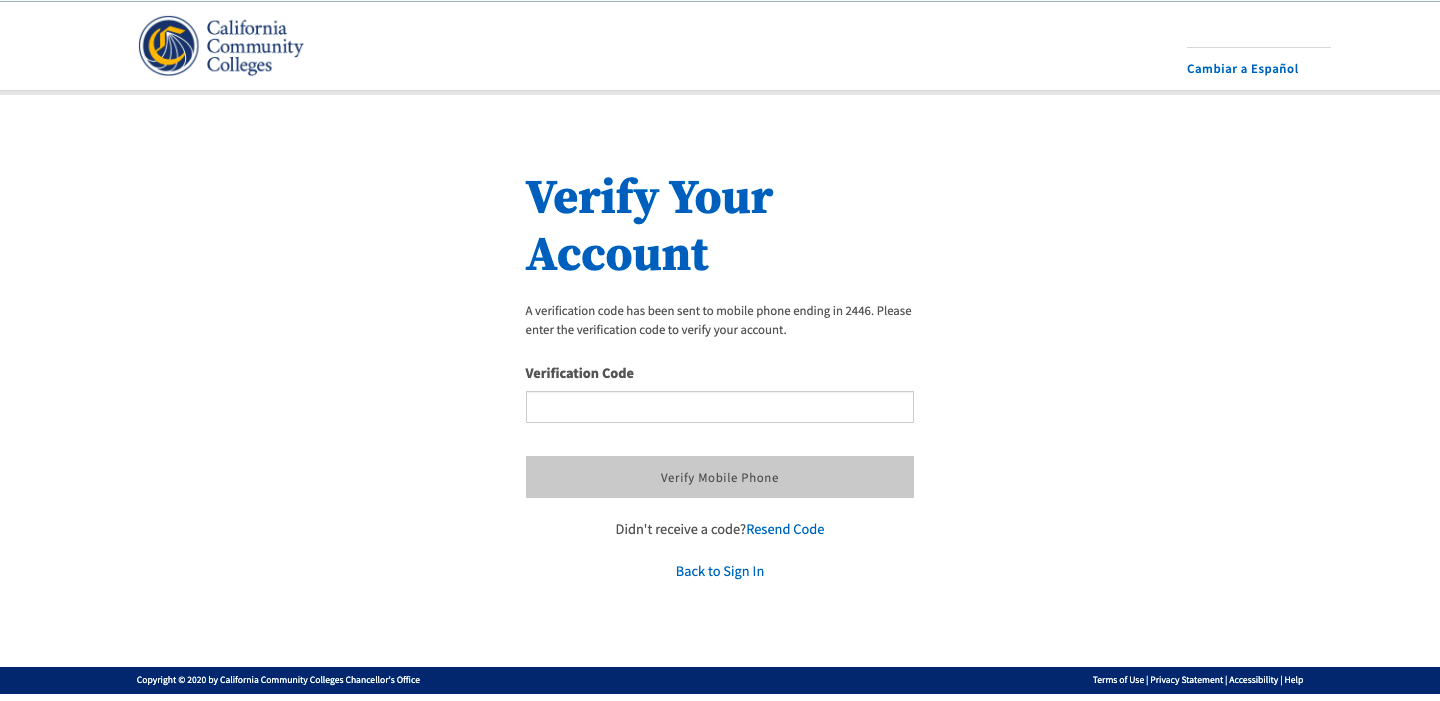
7. Click the Verify Mobile Phone (or Email) button for the system to validate the code.
Success? If your security code is valid, the Create & Verify Account process is complete and the Create Profile section will display.
Didn’t receive your code? Click the Resend Code link to receive a new security code. If you want to switch to the other method of contact, click the Back to Sign In link to start over.
Next: The Create Profile section should be displayed and you are almost done.
Step 2: Create Your Profile
The Create Profile page is divided into three workflows:
Enter and confirm your Contact Information
Provide required Personal Information, and
Create a secure Password
Need Help? If you need assistance during the Create Profile process, click on the Help link in the footer to contact technical support.
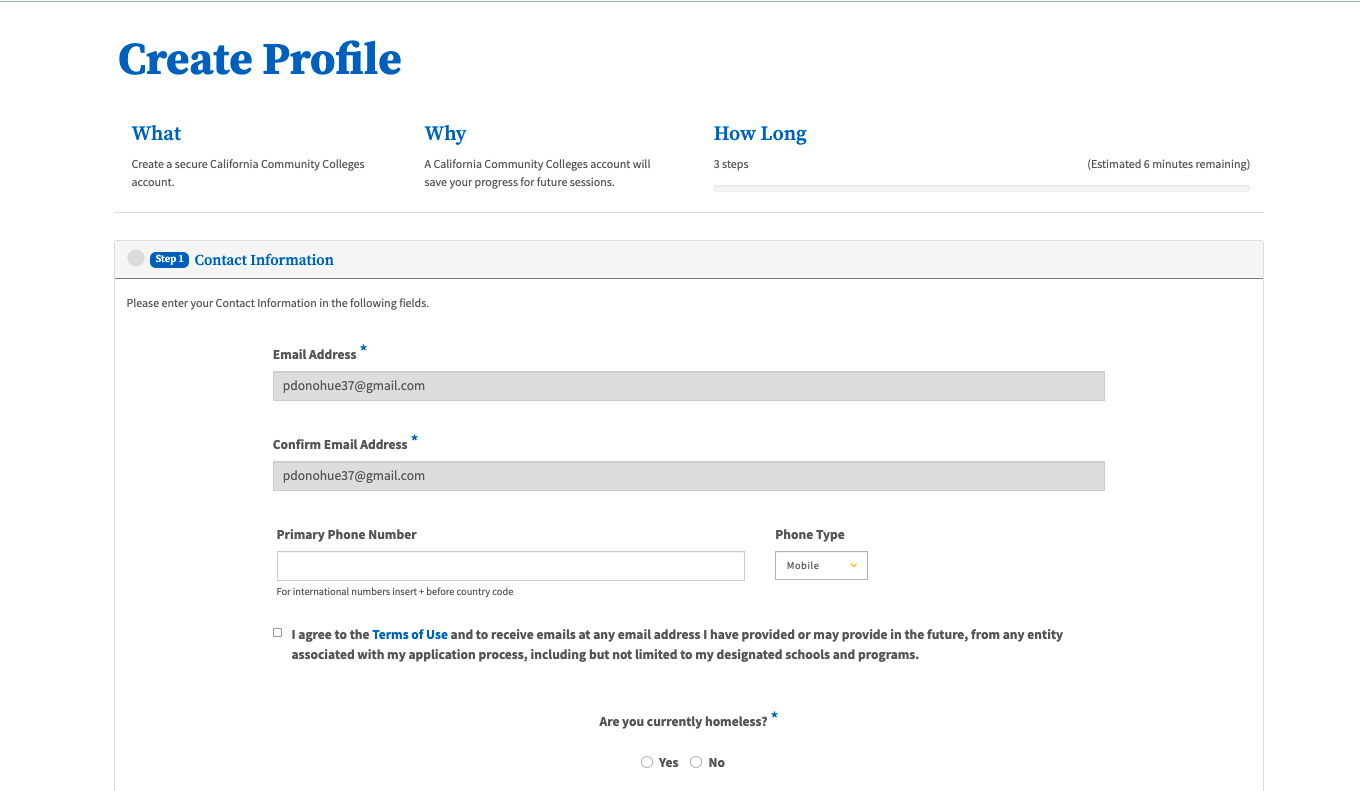
Contact Information Section
The Contact Information section collects the information that helps your college(s) and other systemwide technology applications (as needed) contact you and verify your identity. It’s a short section and includes the following required fields:
Email Address (required, must be unique for security reasons)
Confirm Email Address
Primary Phone Number (mobile phone or landline accepted)
Phone Type
Are you currently homeless? (required)
If you are homeless currently, no further address information will be collected at this time.
If you are NOT currently homeless, the following address fields will display. Required fields will display an asterisk.
Country
State/Province
Street Address 1 & 2
Zip Code/Postal Code
Terms of Use Statement (required)
Steps:
1. Enter a unique Email address and Confirm Email Address.
2. Enter your Primary Phone Number and select its corresponding Phone Type.
3. Read the Terms of Use statement and put a checkmark in the box to acknowledge you understand the terms.
4. If you are currently homeless and do not have a home address where you get legal mail, such as a voter registration ballot or bank account statements, select Yes to the Are you currently homeless? question. No additional address information will be collected, and you will be prompted to continue to the Personal Information section.
5. If you are not homeless, select No to the “Are you currently homeless?” question. Address fields will display.
a. Select your Country from the menu. The default response is the United States; however if the country of your home address is outside the United States, select the correct country from the menu. This is a required field.
b. Select your State or Province from the menu. (Required)
c. Enter your Street Address 1 in the first input field: (Required)
d. Enter additional street address information (Street Address 2) in the second input field, if applicable. This field would contain informations such as a rural address or an apartment number.
d. Enter your Zip Code (US) or Postal Code (non-US). (Requires)
6. Click Next when all required fields are filled to advance to the Personal Information section.
Required fields are identified with an asterisk ( * ). If an asterisk not appear at the end of each field label, you are not required to provide that information.
Note: Once validated, the email or mobile phone number you chose to validate your identity during account creation will be pre-populated in the Contact Information section to save you time. This data cannot be changed until your account is created and confirmed, at which time you can sign in and access the Edit Account system.
Designed for Student Success: To further simplify the account creation process, the system will autofill any information we collect from you in a previous section, such as your email address or mobile phone number (which is collected in the Create & Verify process).
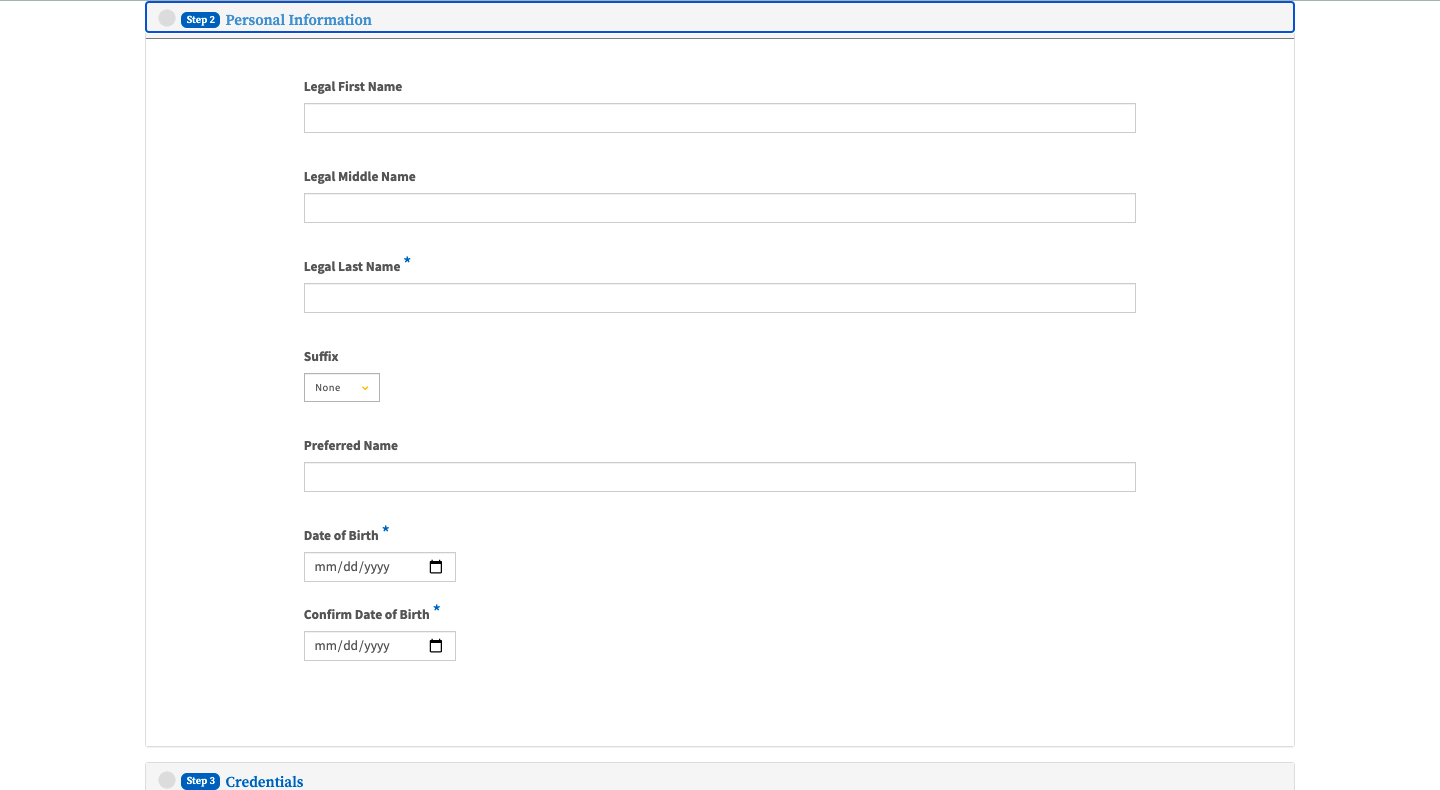
Personal Information Section
The Personal Information section collects the minimal amount of required information needed for your college(s) and other systemwide technology applications to ensure your educational records are complete across your educational journey in the California Community Colleges system. This section includes required fields, shown below, which are denoted with an asterisk:
Legal Name (first, middle, and last)
Preferred Name
Date of Birth / Confirm Date of Birth
Steps:
Enter your legal name:
First name (optional)
Middle name (optional)
Last name (Required).
Suffix, such as Jr., Sr., or III (optional)
Enter a preferred name (optional).
Enter your date of birth manually or select the date from the calendar picker (required)
Confirm your date of birth (Required and both dates must match.)
Click Next to advance to the Credentials section.
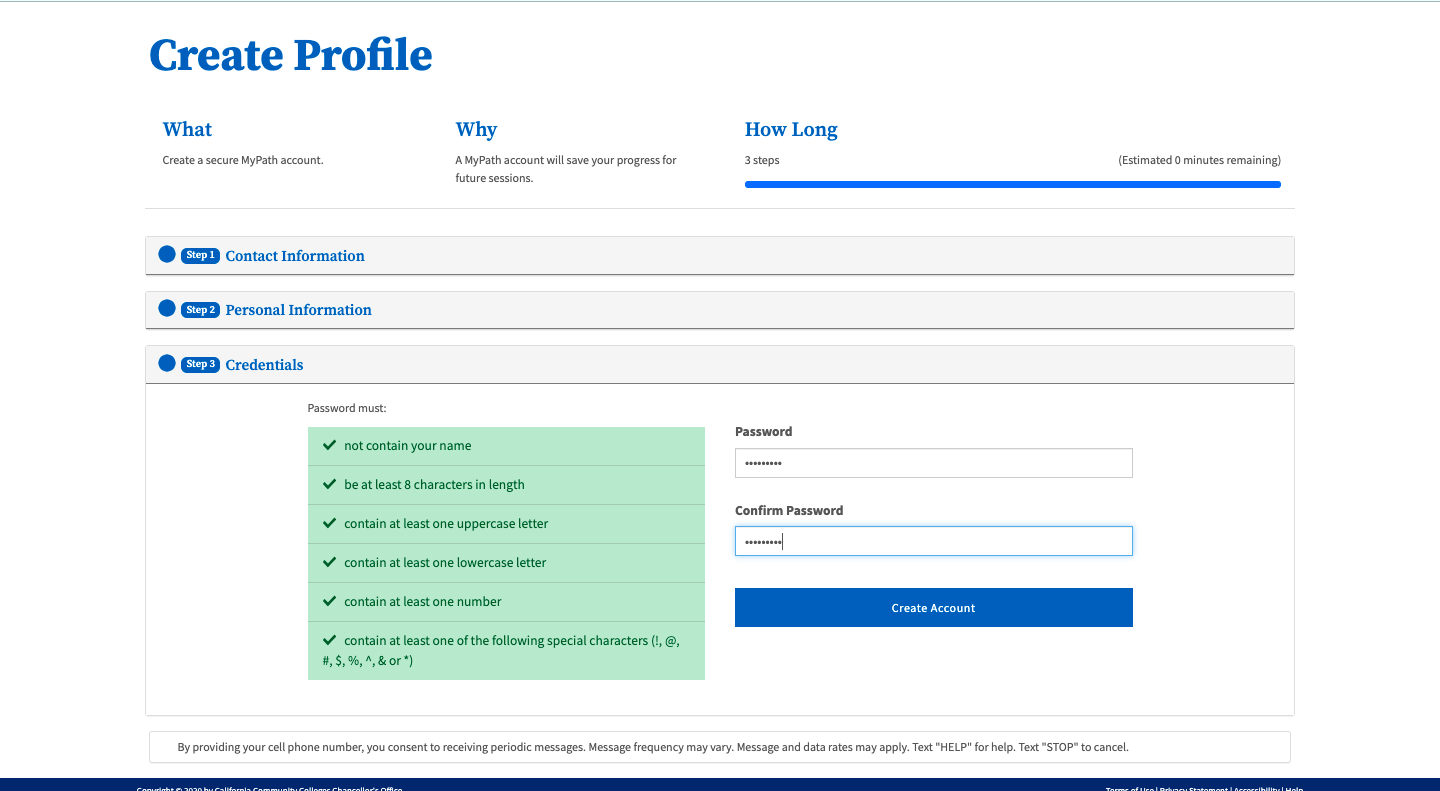
Credentials Section
The final step in the Create Profile section is to set up a secure Password that meets the security criteria requirements.
Your secure password must meet the following requirements:
be at least 8 characters in length
contain at least one uppercase letter
contain at least one lowercase letter
contain at least one number
contain at least one of the following special characters ( !, @, #, $, %, ^, &, or *)
must NOT contain your name
Password Security: When your personal password meets all required criteria, the Password must: box will be solid green, as shown in the screenshot below.
Steps:
Enter a string of letters, numbers, and special characters that meet the password requirements criteria in the Password input field.
Re-enter your unique password in the Confirm Password field to ensure it matches the characters in the Password field exactly (both fields must match).
Click the Submit button to finish creating your account.
Your password will be required if you ever forget your Sign in credentials (email or mobile phone number), or need to edit your account.
Account Confirmation & Next Steps
When you’ve completed all the steps required in the account creation process (outlined above) and click the Submit button, the following happens:
The Account Confirmation screen will display with a button to continue to your destination application.
An Account Confirmation email or text message is sent to your mobile phone or email address.
A unique CCCID is generated for you and stored with your account profile data. This data is sent to the college with your CCCApply admission application or CC Promise Grant fee waiver application.
You will be auto-directed or auto-logged in to your destination URL or application.
To edit your OpenCCC account information:
Click on the Edit Your Account link in the header of any CCC Student Success Suite application, including CCCApply (Standard, Noncredit, or International applications for admission to college), MyPath student onboarding portal, or the CC Promise Grant application (fee waiver grant), to display the Edit Account page. The Sign In page will display.
Enter your email address or the mobile phone number you used to create & verify your account, initially.
If you forgot which email address or mobile phone number was used, click on the Recover Account link on the Sign In page. Follow the prompts to recover your verified sign in credentials.
Edit Your Account in CCCApply
If you reached the Sign In page by clicking on a CCCApply application link from your college’s website, you will land on the My Applications page in CCCApply. After successfully signing in,
Edit Your Account in MyPath
Common Issues & Error Messages
Below are some common issues that may arise during account creation with ways to fix them and keep going. If you encounter other issues not listed here, please contact a Support Representative at the CCC Technology Center.
I didn’t receive a confirmation email or text message. What do I do?
Why do I keep getting the Session Time-Out message?
I’m getting a message that my mobile phone number is not unique. Why is that happening and what do I do now?
I tried to enter my mobile phone number too many times. Why is that happening and what do I do now?
I didn’t receive a validation (security) code. What do I do now?

Why am I getting a message telling me to verify my US address?
Domestic (US) addresses are run through a USPS validation service to ensure the address is valid. If the system detects an invalid address, the Verify Address message will display with a suggested address and the following message: “To ensure an accurate address, we suggest the one below. Would you like to use this suggested address?”
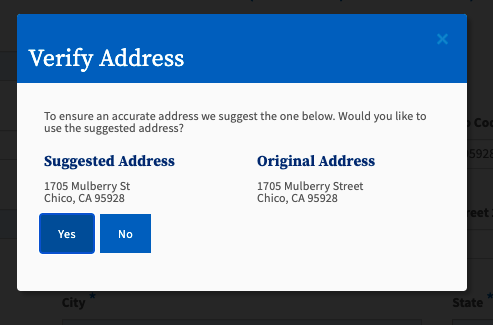
The continue, the user is required to make a Yes or No selection. Selecting Yes will prompt the system to override the original address and replace with the suggested address. Selecting No will prompt the system to maintain the original address, or the user can return and edit the original address provided.
If the system does not display the Verify Address message, the user will be prompted to proceed without incident.
Is support available if I get stuck during account creation?
Yes!

More Frequently Asked Questions
Q: I am more comfortable reading Spanish. Is there any way to translate the onscreen text to Spanish?
A: Yes! Every page of the OpenCCC account system, including account creation, recovery and edit profile, is available in English and Spanish. All onscreen text, error messages, help text, and confirmation emails and text messages, can be viewed in either language by selecting the Switch to Spanish/English link found in the header of every page.

Other How To Guides
How to Edit Your Account with OpenCCC 2.0