| Info |
|---|
This page provides a step-by-step guide for creating a new student account using OpenCCC 2.0. |
OpenCCC 2.0 is currently available in the Pilot environment only. Last update: June 9April 4, 20212022
Sections:
| Table of Contents | ||||
|---|---|---|---|---|
|
...
A new account can be created in just three easy steps:
Choose a preferred sign in method (Enter a unique email address (or mobile phone number) & validate your identity
Provide a few required details needed for your record, and
Set up Create a password to ensure security and support account recovery.
That’s it!
Step 1: Create & Verify Your Account
...
Start on the Sign In page.
Select the Create An Account link below the sign in Sign In input field.
...
Next: The Create Your Account page will display.
| Note |
|---|
Note: The steps below illustrate the process for using a mobile phone number as the user’s By default, the system will prompt the user to use a unique email address for their preferred method of validation. Alternately, a unique email address mobile phone number could be used. |
3. Enter a unique mobile phone number email address in the Mobile Phone Email input field.
4. Click the Text Email My Verification Codebuttonto begin the process of validating your identity.
...
| Tip |
|---|
Success! Attribute is Unique: If your mobile phone number email address is unique, a verification code will be sent in a text messageto the user’s email account. The Verify Your Accountpage is displayed. |
| Warning |
|---|
Attribute is Not Unique: If your mobile phone number email address is not unique or if your primary phone is a landline, you can try again or switch to the other method by selecting Use email mobile phone insteadlink. The page will refresh with the Email Mobile Phone input field. |
| Note |
|---|
Retry Attempts: If you’re certain that your mobile phone email address (or email addressmobile number) is unique to you, try to enter it again. The system will allow 3 retry attempts before displaying an error message. |
...
To validate that the preferred sign in credential used is unique, a security code used is sent to the user’s device associated with the preferred method (email address email account (or mobile phone device). The message is sent from the California Community Colleges and includes a time-sensitive six-digit code which must be obtained and entered on the Verify Your Account page within 10 minutes to continue the account creation process.
...
| Note |
|---|
For security purposes, two-factor validation is used to verify your identity. A time-sensitive security code is sent to the user through their preferred method of contactuser’s email account (or mobile device). The code must be retrieved and used within 10 minutes of requesting the code. Below is an example of the verification code message received by email. |
...
5. Retrieve the six-digit security code from the text message sent to your mobile phone device (or email accountyour email account (or mobile device).
...
| Warning |
|---|
Reminder: The verification security code is time-sensitive and must be entered on the Verify Your Account page within 10 minutes of request. |
...
6. Enter the code in theVerification Code input field on the Verify Your Accountpage.
...
7. Click the Verify Mobile Phone Email button to validate the code.
| Tip |
|---|
Validation Success: If your security code is valid, the create & verify process is complete. The Create Profile section will display next. |
| Warning |
|---|
Didn’t receive your code? Click the Resend Code link to receive a new security code. If you want to switch to the other method of contact, click the Back to Sign In link to start over. |
| Info |
|---|
Next: The Create Profile section should be displayed and you are almost done. |
Next: The Create Profile section . is displayed
The user’s preferred and validated sign in credential (email or mobile number) will be pre-filled in the Profile with the Preferred Method of Contact indicator is set to that method.
Step 2: Create Your Profile
...
| Info |
|---|
Note: Once validated, the email address (or mobile phone number you chose ) used to validate your identity during account creation will be pre-populated in the Contact Information section to save you time. This data cannot be changed until your account is created and confirmed, at which time you can sign in and access the Edit Account system. |
| Tip |
|---|
Designed for Student Success: To further simplify the account creation process, the system will autofill any information we collect from you in a previous section, such as your email address or mobile phone number (which is collected in the Create & Verify process). |
Next: The Personal Information section is displayed.
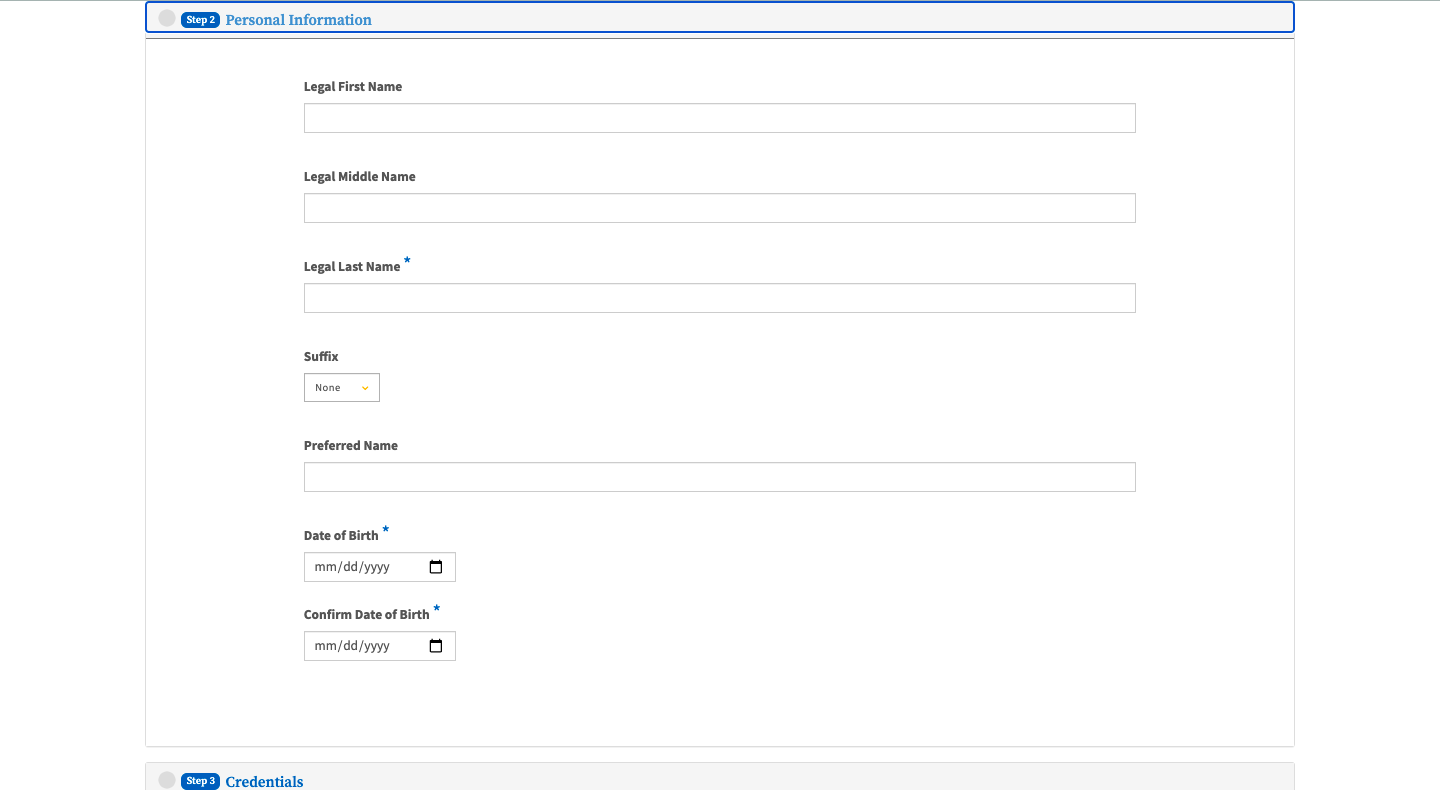
Personal Information Section
...
Enter your legal name:
First name (optional)
Middle name (optional)
Last name (required).
Suffix, such as Jr., Sr., or III (optional)
Enter a preferred name (optional).
Enter your date of birth manually or select the date from the calendar picker (required)
Confirm your date of birth (required andboth dates must match.)
Click Next to advance to the Credentials section.
Next: The Credentials section is displayed.
Credentials Section
The final step in the Create Profile section is to set up a secure Password that meets the security criteria requirements.
...