| Note |
|---|
This page provides a step-by-step guide for creating a new account with OpenCCC 2.0. |
...
Where do students go to create an account?
Most students create their account the first time they apply to a California Community College using CCCApply, the systemwide application for admission to college. Alternately, students may encounter the OpenCCC account on their way to explore Career Coach,
How long does it take to create an account?
...
Start on the Sign In page.*
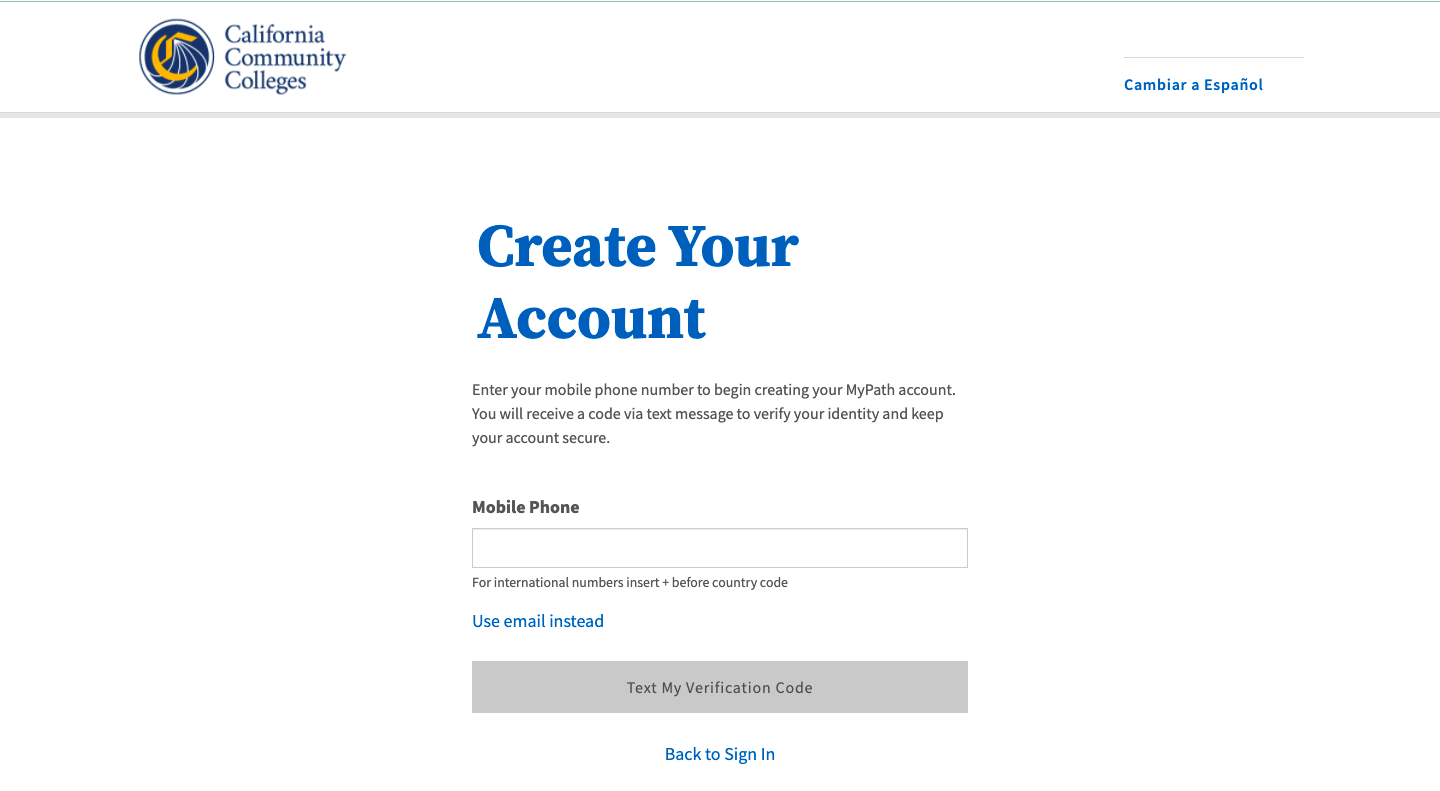
Select the Create An Account link below the Email or mobile phone input field. The Create Your Account page will display.
...
| Warning |
|---|
If your mobile phone number is not unique or if your primary phone is a landline, you can try again or switch to the other method by selecting Use email instead link. |
| Tip |
|---|
Option: If your primary phone is a landline phone or your mobile phone number is not unique to you, select the Use email instead link to use your email address for validating your identity. |
...
The Contact Information section collects the information that helps your college(s) and other systemwide technology applications (as needed) contact you and verify your identity. It’s a short section and includes the following required fields:
Email Address (required, must be unique for security reasons)
Confirm Email Address
Primary Phone Number (mobile phone or landline accepted)
Phone Type
Are you currently homeless? (required)
If you are homeless currently, no further address information will be collected at this time.
If you are NOT currently homeless, the following address fields will display. Required fields will display an asterisk.
Country
State/Province
Street Address 1 & 2
Zip Code/Postal Code
Terms of Use Statement (required)
Steps:
...
3. Read the Terms of Use statement and put a checkmark in the box to acknowledge you understand the terms.
4. Select Yes to Are If you are currently homeless ?if you and do not have a current home address . If yes, no where you get legal mail, such as a voter registration ballot or bank account statements, select Yes to the Are you currently homeless? question. No additional address information will be collected, and you will be prompted to continue to the Personal Information section.
5. If you are not homeless, select No to the “Are you currently homeless?” question. Address fields will display.
a. Select your Country from the menu. The default response is the United States; however if the country of your home address is outside the United States, select the correct country from the menu. This is a required field.
b. Select your State or Province from the menu. (Required)
c. Enter your Street Address in the first input field: (Required)
d. Enter additional street address information in the second input field, if applicable. This field would contain informations such as a rural address or an apartment number.
d. Enter your Zip Code (US) or Postal Code (non-US). (Requires)
6. Click Next when all required fields are filled to advance to the Personal Information section.
...
Enter your legal name:
First name
Middle name (if applicable)
Last name (required).
Suffix, such as Jr., Sr., or III (if applicable)
Enter a preferred name (if applicable).
If you answered No to “Are you currently homeless?” in the Contact Information section, the following fields will display in the Personal Information section. Otherwise they will not display.
a. Country: The default response will be United States. If your current address is outside the United States, select your current country from the menu.
b. State/Province: Enter your address state or province.
c. Street Address: Enter the name of the street of your home address. If you have an apartment number or additional street address, enter that information in the second street field.
d. Zip Code / Postal Code: Enter your zip code (US) or postal code (non-US).
Required information will be denoted by an asterisk in the field label.
Enter your date of birth (required)
Confirm your date of birth (required)
Click Next to advance to the Credentials section.
...
