| Info |
|---|
CCC Data Warehouse Report Server v7.8 Last Update: Feb 2022 |
...
Authenticator for Mac and Windows Chrome browsers is available free from the Chrome Web Store. This app installs very quickly to your desktop (recommended) as well as your phone, and includes a lot of great features that promote security and usability. NOTE: The entire download and install process takes less than one minute. You may need local IT authorization and assistance to install it if policy requires this.
To Install the Chrome Authenticator:
...
To run a report, click the name of a report in the repository. For example, click DW LGBTQ Report. The report appears in the Report Viewer.
...
On the Home page, click Create in the Reports block. The Create Report wizard opens.
Select the Ad Hoc view you want to use as the basis for your report.
Select a report template. To use a template other than the default, select Custom Report Template, click Browse and select the desired template. See Report Templates for more information.
Click OK. If asked, enter the input controls needed. See Using Input Controls.
You can now begin working with your report.
...
| Info |
|---|
Creating Filters with Relative DatesYou can filter information in your view based on a date range relative to the current system date. You can accomplish this using date-based filters, and entering a text expression describing the relative date or date span you want to display, using the format <Keyword>+/-<Number> where:
For example, if you want to see all of the CC Promise Grant Applications submitted during the prior week, your expression would be: WEEK-1. |
...
| Info |
|---|
The steps to customize an existing Report template apply to any/all existing template that you are templates that your user account is permitted to access, including all the templates in the Public folders. |
...
Step 4: With your copy of the Ad Hoc View open in the Ad Hoc Editor, follow the steps provided previously information provided in Part 4: Creating Custom Ad Hoc Views & Reports in this guide.
Note: When you first open the copy of the Ad Hoc View, the initial view will depend on the default Input Controls set in the Filters column (if any).
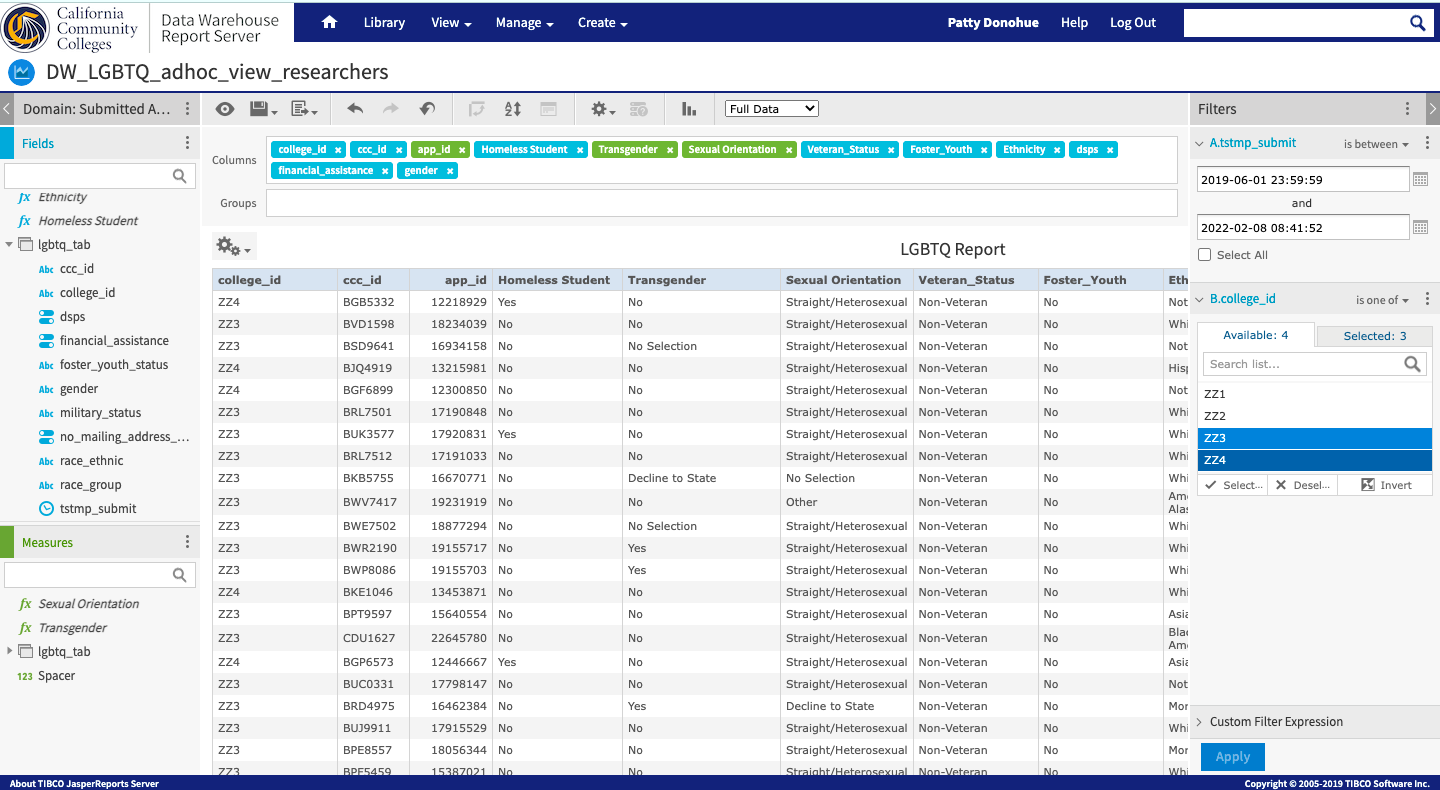
Your copy of the Ad Hoc View may appear without any data rows displayed due to the input control filters set. Review and update the filters as needed. | The screenshot below shows the same Ad Hoc View with the filters updated. |
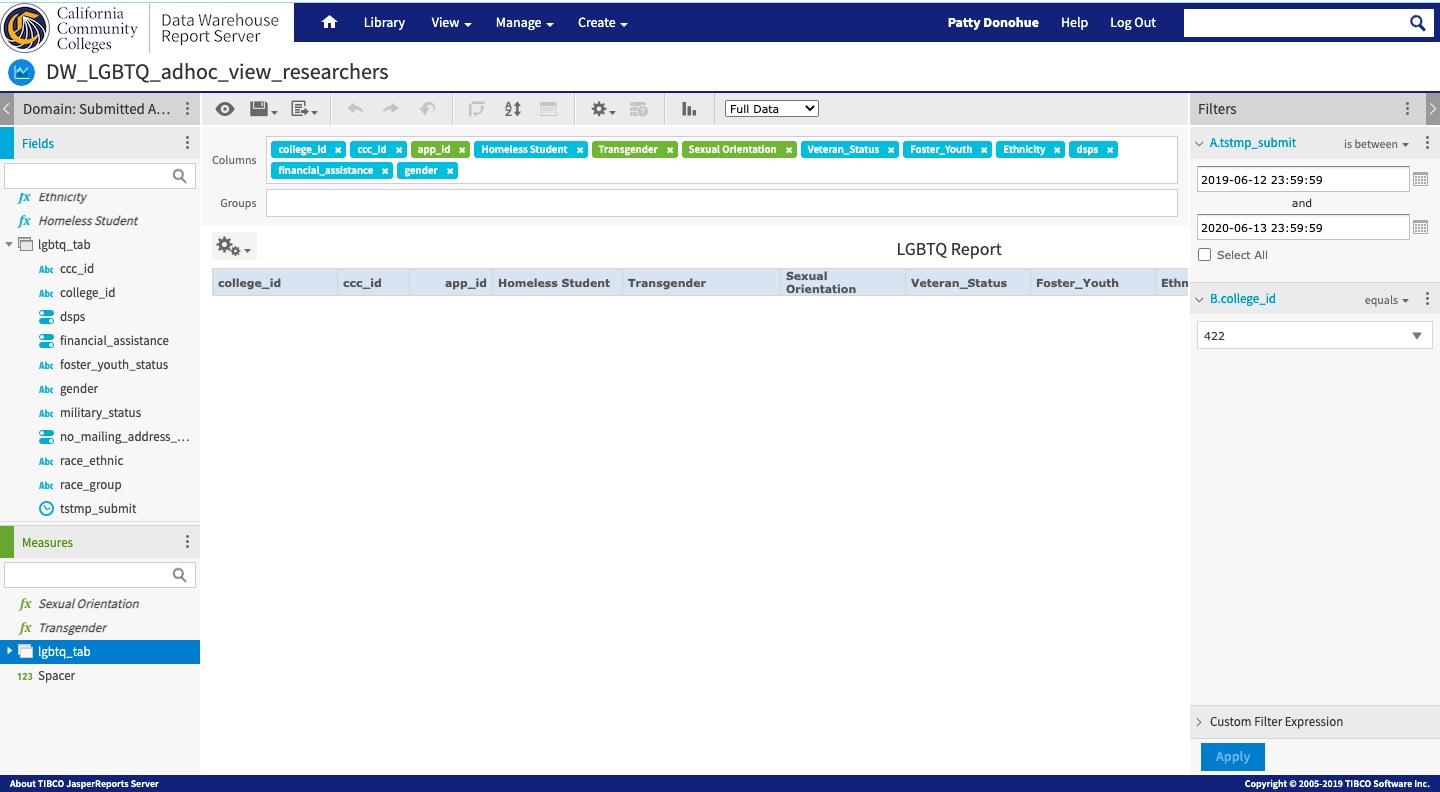 |  |
| Info |
|---|
For more guidance, see Copy and Customize An Existing Report Viewpreviously in this guide. |
| Tip |
|---|
Optional: To change the report format type of the Ad Hoc View and eventually your Report template, follow the steps below. |
...
Once you’ve selected the fields you want to be visible in the Ad Hoc Editor - which can be used as data field columns, measures, groups, and/or input control filters, click OK.
...
In the example above, you will now see “birthdate” as an available data field in the Fields column and can be used in your report.
...
| Tip |
|---|
Optional: To add or remove Input Controls (filters) in your Ad Hoc View, do this… |
...
| Tip |
|---|
please refer to the section Understanding & Using Filters (Input Controls) in this guide. |
The Filterscolumn is the right column panel in the Ad Hoc Editor. Any filters that were added when the Ad Hoc View template originally will appear in the Filters column. These filters can be revised or removed, and the operator for each filter can be changed. | 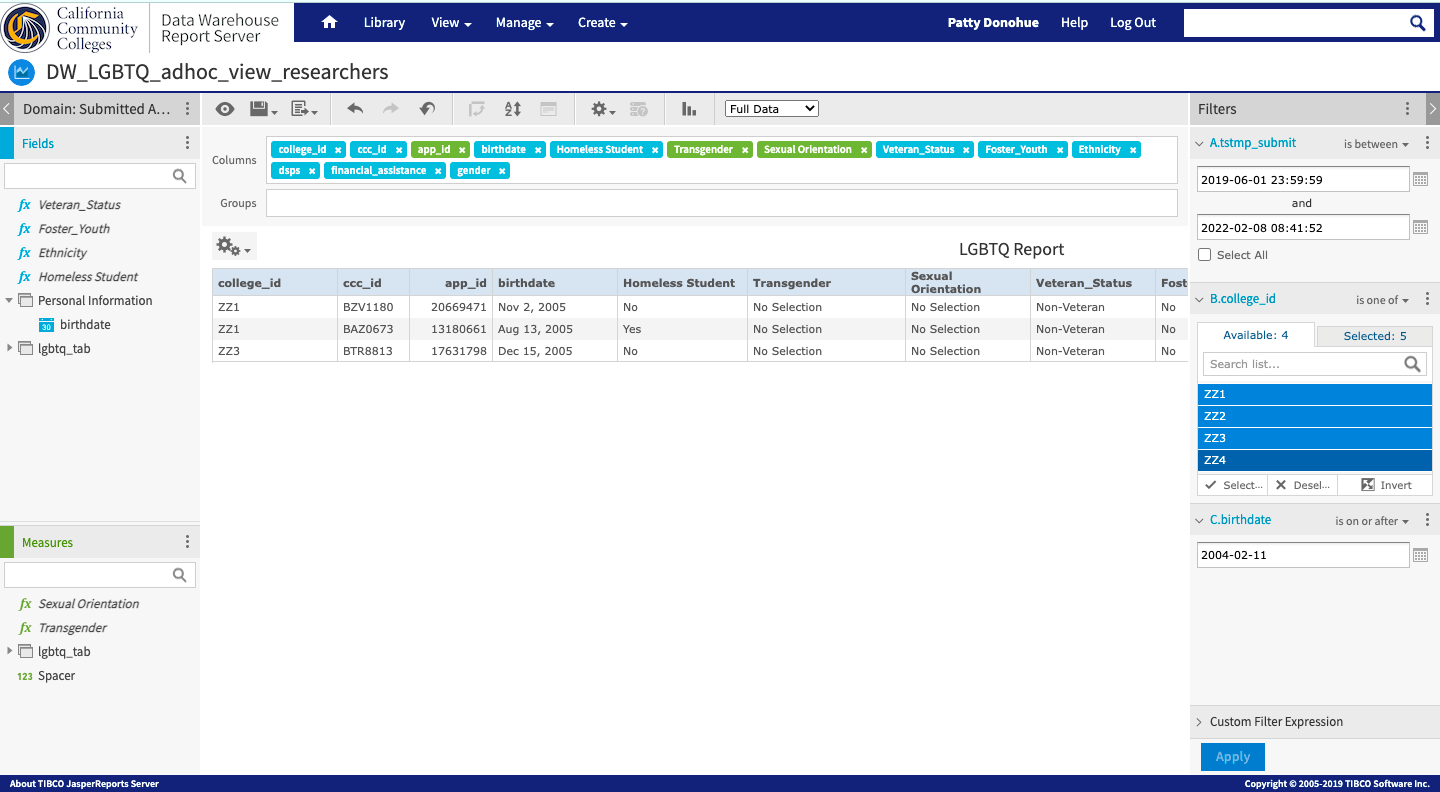 | ||
Filters are based on data fields that are visible in the Ad Hoc Editor for use in your Ad Hoc View. Filters cannot be based on fields that have not been made visible in your Ad Hoc View. In the screenshot to the right, the filters included are based on “tstmp_submit” and “college_id”. | 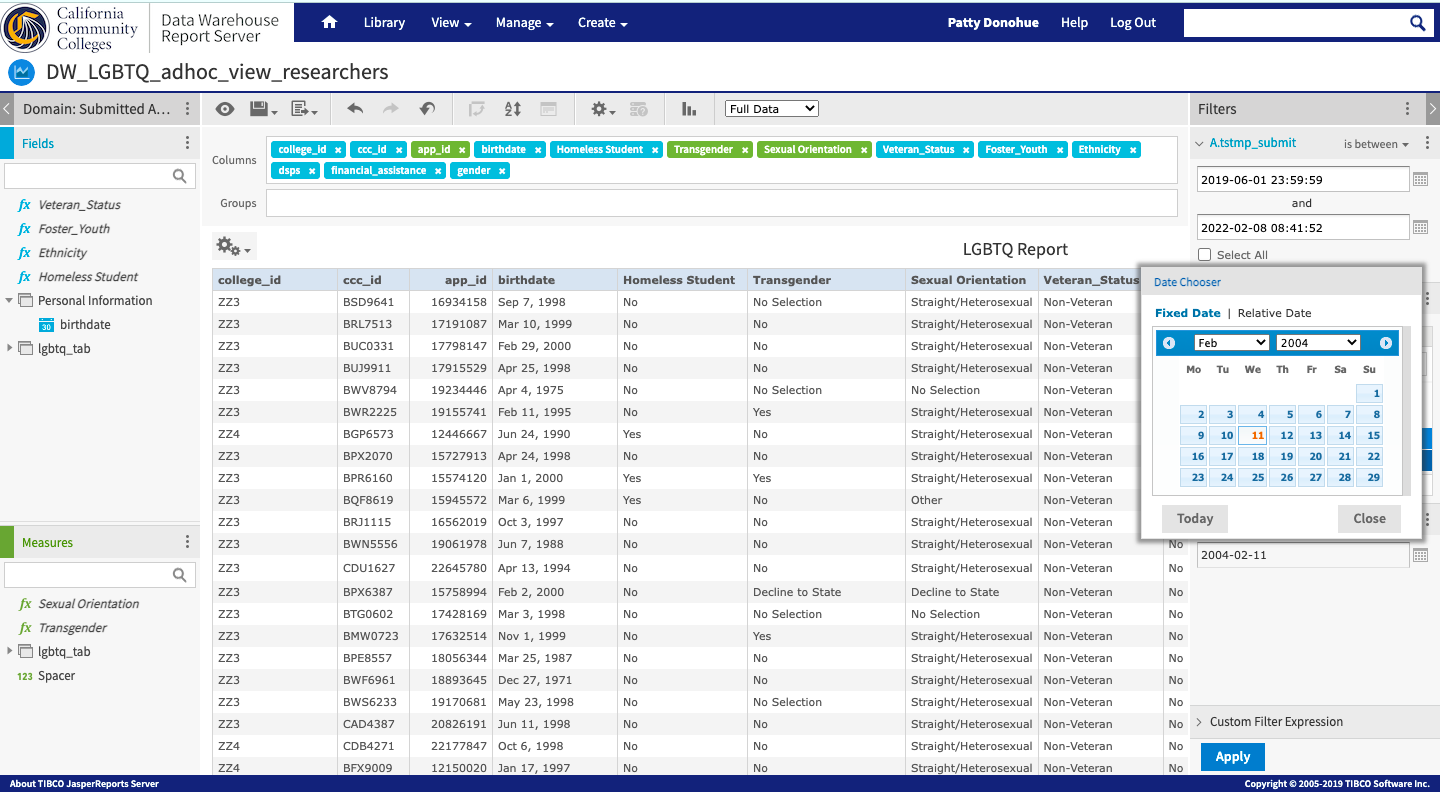 | ||
To add a new filter to your Ad Hoc View/Report, right click on the selected field in the Data Field Selection panel and click on Create Filter. The new filter will be added to the Filters panel. | 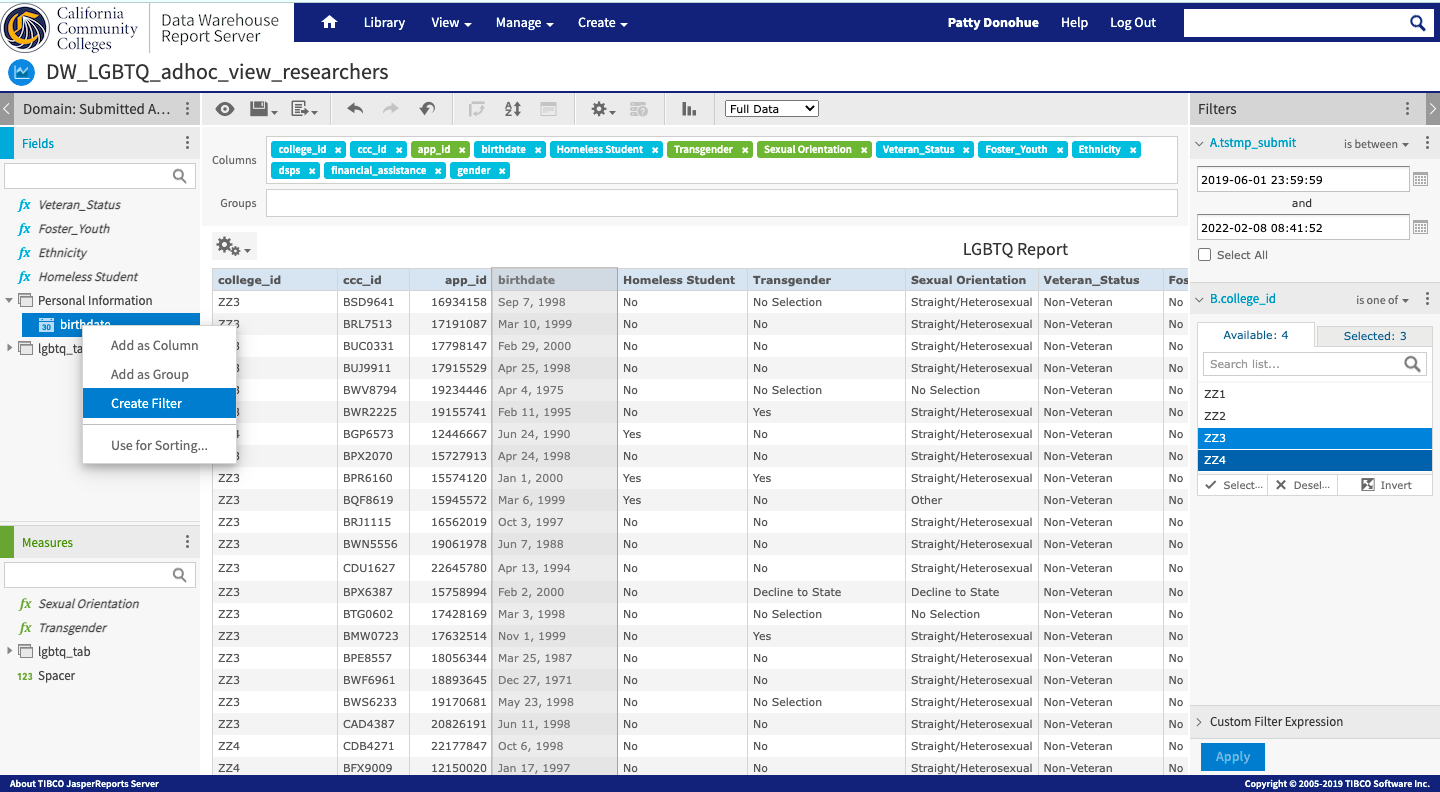 | ||
Once the new filter has been added to the Filters panel, open the Change Operator menu and select the appropriate operator that will be used to filter your data.
| 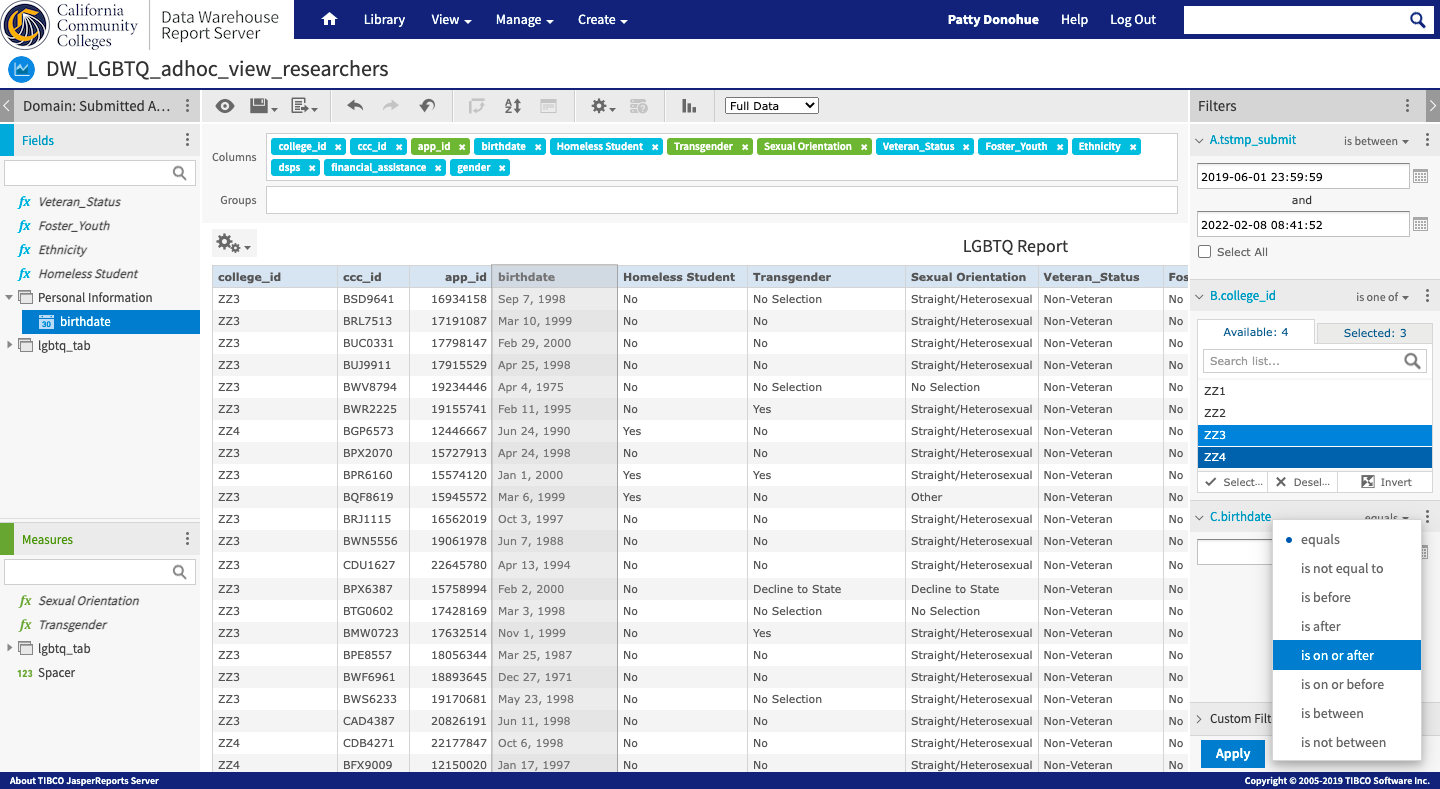 |
| Tip |
|---|
Option: To add a Group to your table report, do this… |
Step 4: Save your changes using the Save As > Save Ad Hoc View and Create Report function.
...